OpenSearch
Ship your OpenSearch Metrics via Telegraf to your Logit.io Stack
Follow the steps below to send your observability data to Logit.io
Metrics
Configure Telegraf to ship OpenSearch metrics to your Logit.io stacks.
Install Integration
Install Telegraf
This integration allows you to configure a Telegraf agent to send your metrics to Logit.io.
Choose the installation method for your operating system:
When you paste the command below into Powershell it will download the Telegraf zip file.
Once that is complete, press Enter again and the zip file will be extracted into C:\Program Files\InfluxData\telegraf\telegraf-1.34.1.
wget https://dl.influxdata.com/telegraf/releases/telegraf-1.34.1_windows_amd64.zip -UseBasicParsing -OutFile telegraf-1.34.1_windows_amd64.zip
Expand-Archive .\telegraf-1.34.1_windows_amd64.zip -DestinationPath 'C:\Program Files\InfluxData\telegraf'
or in Powershell 7 use:
# Download the Telegraf ZIP file
Invoke-WebRequest -Uri "https://dl.influxdata.com/telegraf/releases/telegraf-1.34.1_windows_amd64.zip" `
                -OutFile "telegraf-1.34.1_windows_amd64.zip" `
                -UseBasicParsing

# Extract the contents of the ZIP file
Expand-Archive -Path ".\telegraf-1.34.1_windows_amd64.zip" `
            -DestinationPath "C:\Program Files\InfluxData\telegraf"
The default configuration file is location at:
C:\Program Files\InfluxData\telegraf\telegraf.conf
Configure the Telegraf input plugin
The configuration file below is pre-configured to scrape the system metrics from your hosts, add the following code to the configuration file telegraf.conf from the previous step.
# Derive metrics from aggregating OpenSearch query results
[[inputs.opensearch_query]]
  ## OpenSearch cluster endpoint(s). Multiple urls can be specified as part
  ## of the same cluster.  Only one successful call will be made per interval.
  urls = [ "https://node1.os.example.com:9200" ] # required.

  ## OpenSearch client timeout, defaults to "5s".
  # timeout = "5s"

  ## HTTP basic authentication details
  # username = "admin"
  # password = "admin"

  ## Skip TLS validation.  Useful for local testing and self-signed certs.
  # insecure_skip_verify = false

  [[inputs.opensearch_query.aggregation]]
    ## measurement name for the results of the aggregation query
    measurement_name = "measurement"

    ## OpenSearch index or index pattern to search
    index = "index-*"

    ## The date/time field in the OpenSearch index (mandatory).
    date_field = "@timestamp"

    ## If the field used for the date/time field in OpenSearch is also using
    ## a custom date/time format it may be required to provide the format to
    ## correctly parse the field.
    ##
    ## If using one of the built in OpenSearch formats this is not required.
    ## https://opensearch.org/docs/2.4/opensearch/supported-field-types/date/#built-in-formats
    # date_field_custom_format = ""

    ## Time window to query (eg. "1m" to query documents from last minute).
    ## Normally should be set to same as collection interval
    query_period = "1m"

    ## Lucene query to filter results
    # filter_query = "*"

    ## Fields to aggregate values (must be numeric fields)
    # metric_fields = ["metric"]

    ## Aggregation function to use on the metric fields
    ## Must be set if 'metric_fields' is set
    ## Valid values are: avg, sum, min, max, sum
    # metric_function = "avg"

    ## Fields to be used as tags.  Must be text, non-analyzed fields. Metric
    ## aggregations are performed per tag
    # tags = ["field.keyword", "field2.keyword"]

    ## Set to true to not ignore documents when the tag(s) above are missing
    # include_missing_tag = false

    ## String value of the tag when the tag does not exist
    ## Required when include_missing_tag is true
    # missing_tag_value = "null"

### System metrics
[[inputs.disk]]
[[inputs.net]]
[[inputs.mem]]
[[inputs.system]]
[[inputs.cpu]]
  percpu = false
  totalcpu = true
  collect_cpu_time = true
  report_active = true

### Output
[[outputs.http]]
  url = "https://@metricsUsername:@metricsPassword@@metrics_id-vm.logit.io:@vmAgentPort/api/v1/write"
  data_format = "prometheusremotewrite"

  [outputs.http.headers]
    Content-Type = "application/x-protobuf"
    Content-Encoding = "snappy"
Read more about how to configure data scraping and configuration options for OpenSearch (opens in a new tab)
Start Telegraf
From the location where Telegraf was installed (C:\Program Files\InfluxData\telegraf\telegraf-1.34.1) run the program
providing the chosen configuration file as a parameter:
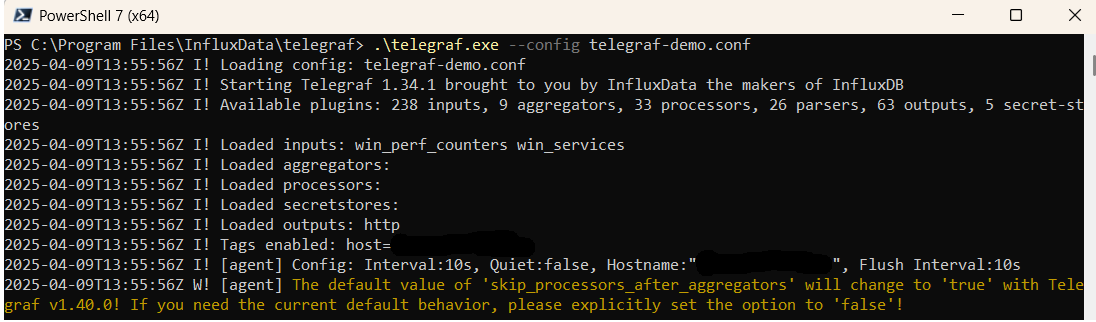
.\telegraf.exe --config telegraf.confOnce Telegraf is running you should see output similar to the following, which confirms the inputs, output and basic configuration the application has been started with:
Launch Grafana to View Your Data
Launch GrafanaHow to diagnose no data in Stack
If you don't see data appearing in your stack after following this integration, take a look at the troubleshooting guide for steps to diagnose and resolve the problem or contact our support team and we'll be happy to assist.
Telegraf OpenSearch metrics Overview
For efficient monitoring and analysis of OpenSearch metrics across distributed systems, it's paramount to employ a robust and effective metrics management solution. Telegraf, an open-source server agent designed for collecting and sending telemetry data, is perfectly suited for this role, capable of capturing OpenSearch metrics from numerous sources such as operational OpenSearch clusters, databases, and other relevant applications.
Telegraf offers a broad range of input plugins that allow users to gather metrics from a variety of sources like CPU usage, memory utilization, network traffic, among others - key for understanding OpenSearch performance. To store and sift through these harvested metrics, organizations can turn to Prometheus, an open-source monitoring and alerting toolkit celebrated for its flexible querying language and superior data visualization features.
In order to relay OpenSearch metrics from Telegraf to Prometheus, organizations need to configure Telegraf to output metrics in the Prometheus format, and then arrange for Prometheus to scrape these metrics from the Telegraf server. This involves setting up Telegraf to collect OpenSearch metrics, exporting them in the Prometheus format, adjusting Prometheus to fetch these metrics from the Telegraf server, and subsequently decoding the data using Prometheus's advanced querying and graphical visualization tools.
After the successful integration of metrics into Prometheus, further analysis and visualization can be undertaken using Grafana. A top-tier open-source software renowned for its monitoring and observability functions, Grafana is fully compatible with Prometheus. It enables users to construct dynamic, interactive dashboards for deep-diving into the metrics data, providing a holistic understanding of performance trends and potential challenges in the OpenSearch system.
If you need any further assistance with shipping your log data to Logit.io we're here to help you get started. Feel free to get in contact with our support team by sending us a message via live chat & we'll be happy to assist.