AWS S3 bucket with an SQS queue
Intelligently ingest logs from an Amazon S3 bucket using ObjectCreated notifications to your Stack
Follow the steps below to send your observability data to Logit.io
Logs
We will be configuring one or more S3 buckets to generate notifications when Objects are created,
then using those notifications to consume newly created objects without having to list the full contents of the S3 bucket.
This particularly suits buckets containing a large number of objects e.g. cloudtrail logs.
Install Integration
Before you begin
You will need to know the ARN (amazon resource name) for your S3 bucket(s) and the SQS queue will need to be created in the same region as the bucket(s).
Create SQS queue
From within the AWS console, navigate to Simple Queue Service, then confirm your are in the same region as your S3 bucket.
Click Create queue
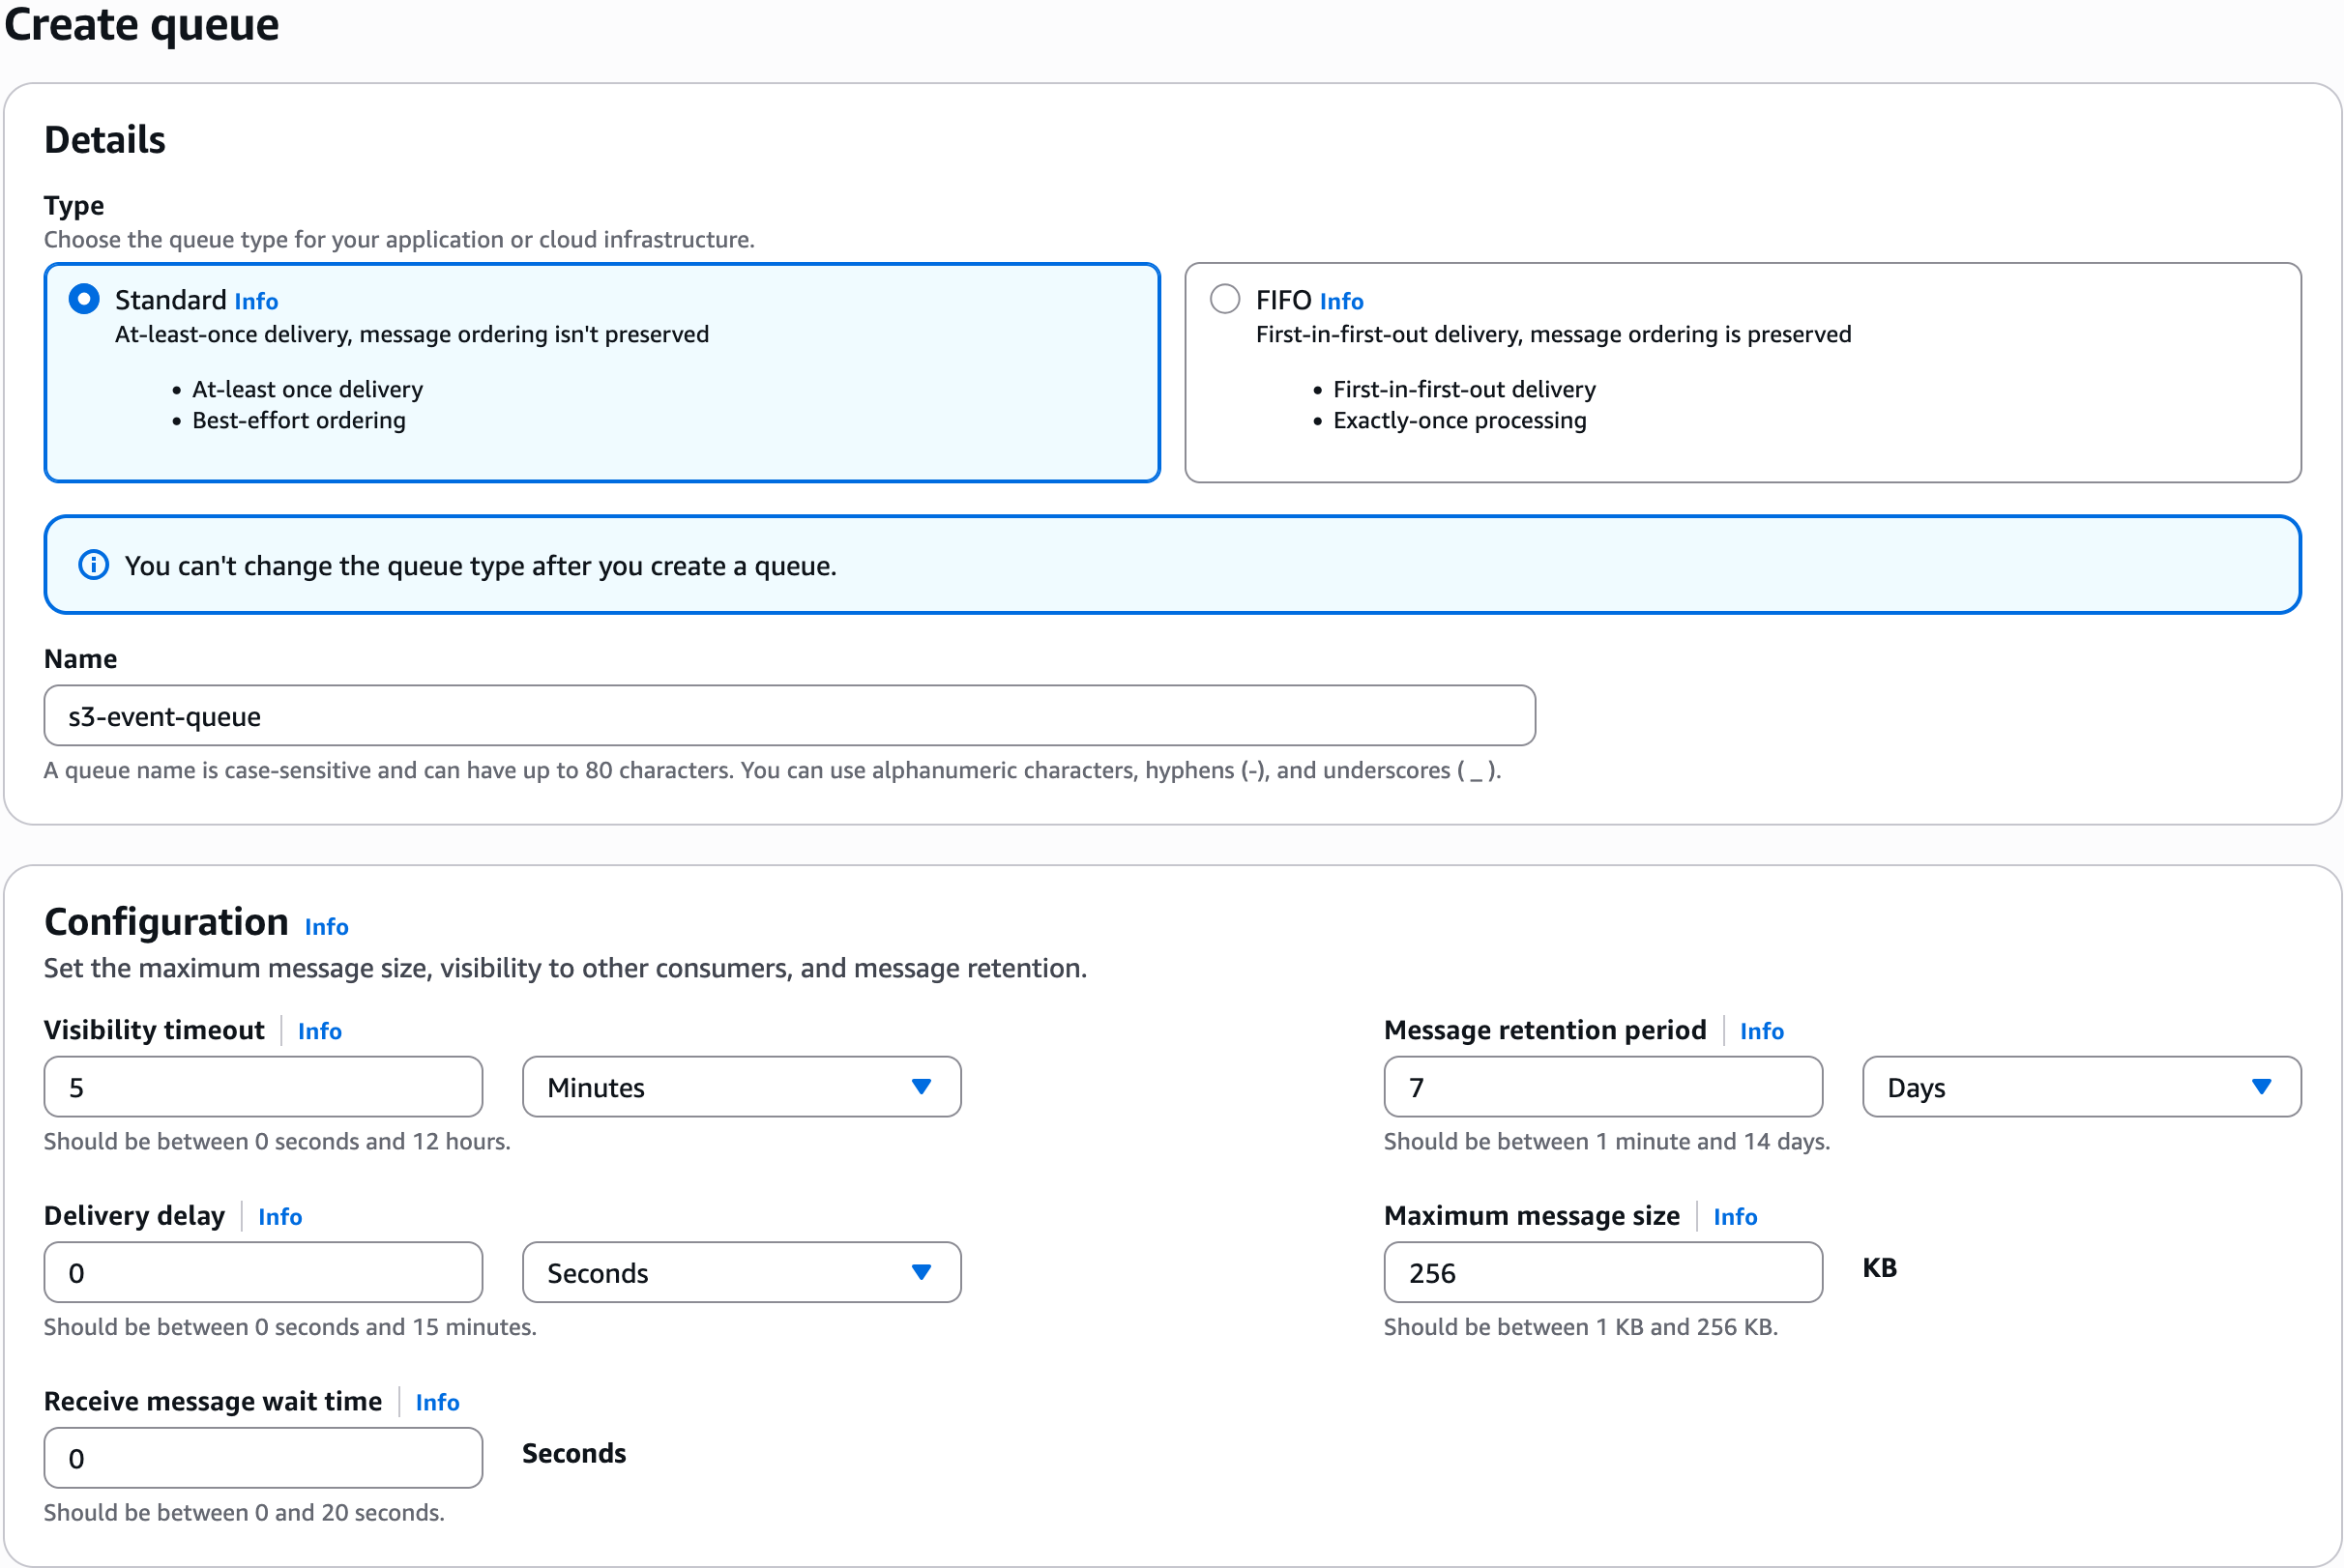
Type: Standard
Name: Name of your queue
Visibility timeout: 5 minutes
Message retention period: 7 days
Access policy: Choose Advanced and use the policy template below.
This will grant the listed S3 buckets permission to send messages to the SQS queue.
Make sure you update with Resource details for your SQS queue and the name of your S3 bucket(s)
If you only have one bucket, delete the 2nd entry from the aws:SourceArn condition key and remove the trailing comma on the line above.
  {
      "Version": "2012-10-17",
      "Statement": [
          {
              "Principal": "*",
              "Resource": "arn:aws:sqs:<region>:<account id>:<queue name>",
              "Effect": "Allow",
              "Action": [
                  "sqs:SendMessage"
              ],
              "Condition": {
                  "ArnLike": {
                      "aws:SourceArn": [
                          "arn:aws:s3:::<1st bucket name>",
                          "arn:aws:s3:::<2nd bucket name>"
                      ]
                  }
              }
          }
      ]
  }
Scroll to the bottom of the page and click Save
Configure the S3 bucket
If you have multiple buckets you will need to repeat this section for each bucket.
From within the AWS console, navigate to S3 and select your bucket.
Click the Properties tab, scroll down to Event notifications and Create event notification
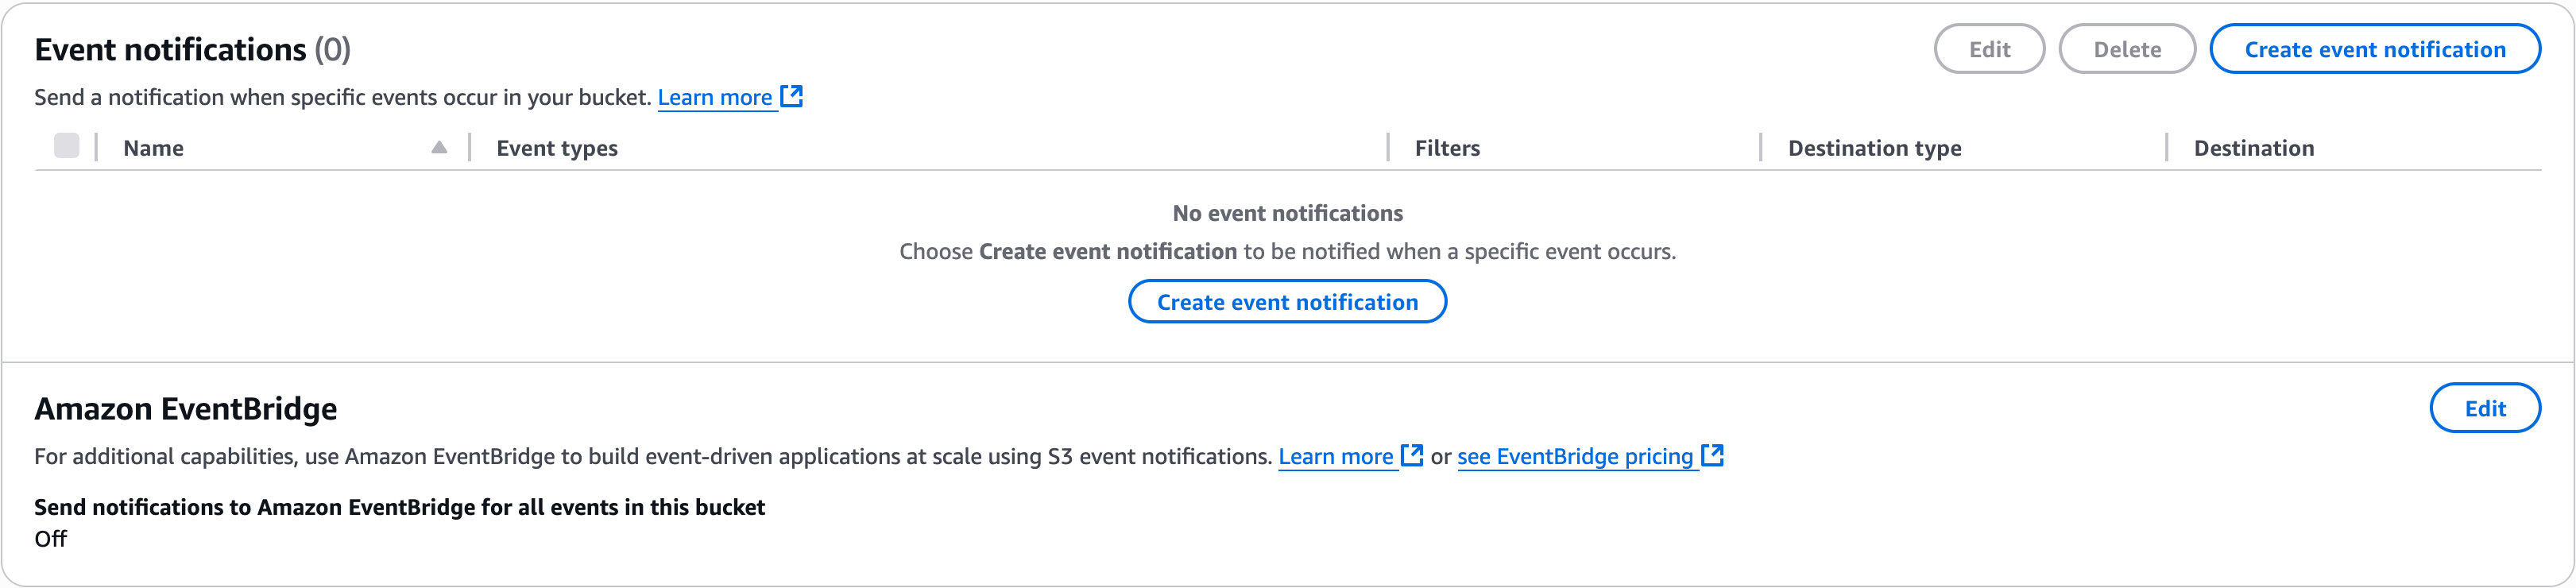
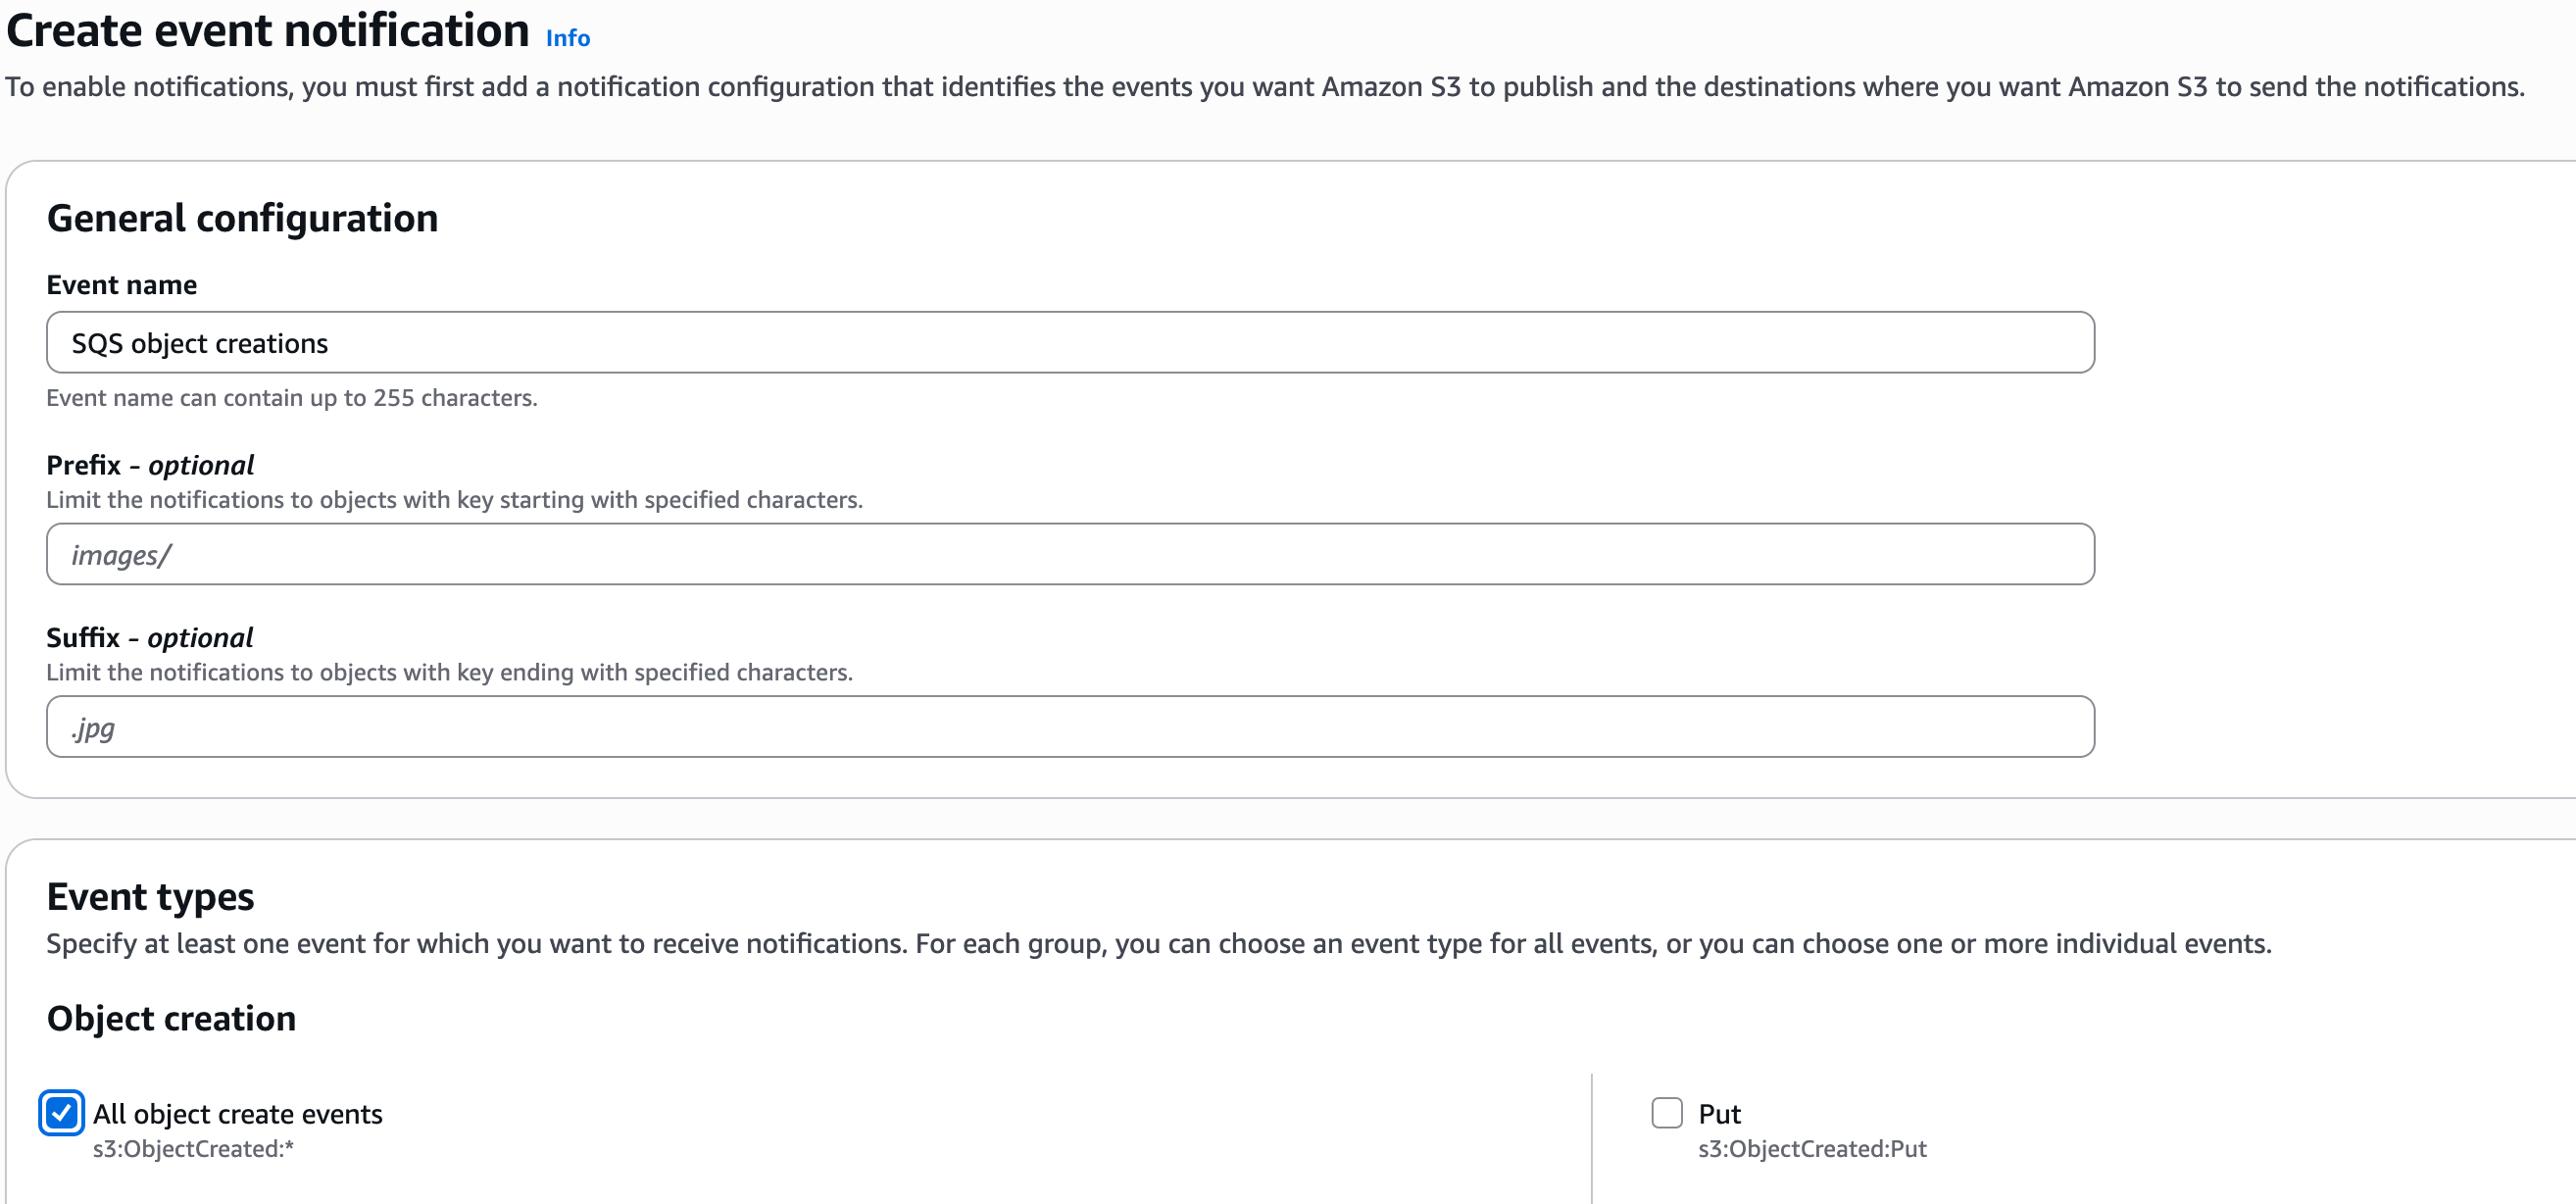
Event name: Name of your Event
Prefix + Suffix: are optional and can be used to restrict notifications to only some object paths or names
Events: select All object create events
Scroll to near the bottom of the page
 Destination: SQS queue
SQS queue: Choose your queue from the drop down
Make sure you Save changes
To Test your configuration - if you create a new object in your bucket, you should see the number of messages in your SQS queue increase.
Create iam user/policy
This will create a single policy/user to access the SQS queue and read from the S3 buckets.
If you wish to use separate users for this, split the statements into multiple policies.
From within the AWS console, navigate to IAM (Identity and Access Management) and open Policies from the left menu
Click Create policy, select JSON and use the policy template below.
This will grant the ability to consume messages off the SQS queue, along with list and read objects in the S3 bucket(s)
Make sure you update with Resource details for your SQS queue and the name of your S3 bucket(s)
If you only have one bucket, delete the 2nd bucket lines and remove the trailing comma on the line above.
  {
      "Version": "2012-10-17",
      "Statement": [
          {
              "Effect": "Allow",
              "Action": [
                  "sqs:Get*",
                  "sqs:List*",
                  "sqs:ReceiveMessage",
                  "sqs:ChangeMessageVisibility*",
                  "sqs:DeleteMessage*"
              ],
              "Resource": [
                  "arn:aws:sqs:<region>:<account id>:<queue name>"
              ]
          },
          {
              "Effect": "Allow",
              "Action": [
                  "s3:Get*",
                  "s3:List*"
              ],
              "Resource": [
                  "arn:aws:s3:::<1st bucket name>",
                  "arn:aws:s3:::<1st bucket name>/*",
                  "arn:aws:s3:::<2nd bucket name>",
                  "arn:aws:s3:::<2nd bucket name>/*"
              ]
          }
      ]
  }
Click next
Name your policy appropriately and Create policy
Then open Users and Create user
Name: Name for your user
Click next
Permission options: Attach policies directly
Permission policies: Find and select the policy you just created
Click next and then Create User
Select the user you just created, select Security credentials, scroll down to Access keys and Create access key
Choose Third-party service, acknowledge the warning and click Next
Set a description (optional) and click Create access key
Note down your access keys, you will need them later.
Populate the Input form
You should now have all the details you need to fill in the S3 SQS input form, you can find the form by clicking the link below if you are logged in.
Go to Dashboard