AWS EC2
Ship Amazon EC2 Instance metrics to Logstash using the Logstash Cloudwatch plugin
Follow the steps below to send your observability data to Logit.io
Logs
Install Integration
Create IAM Policy
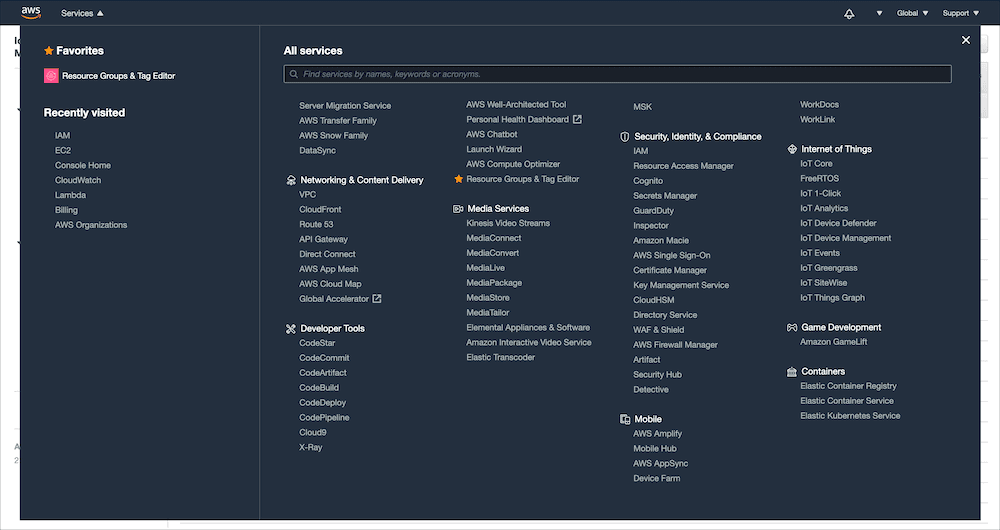
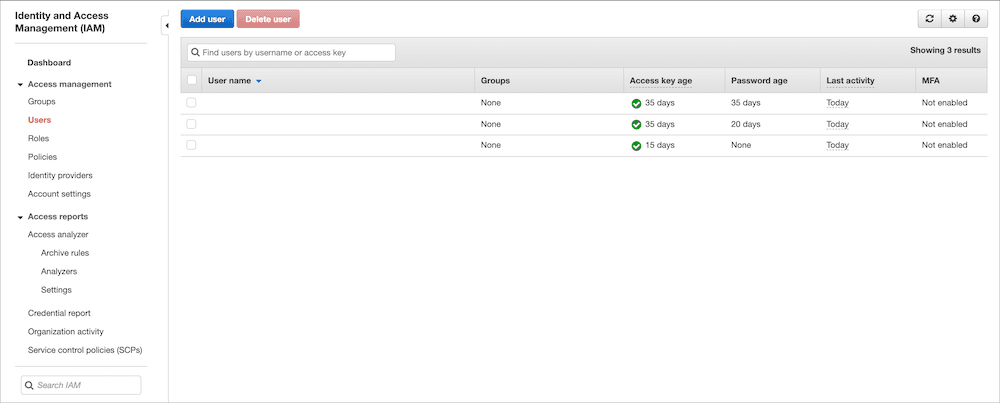
In the top left corner of your aws console you will notice a services drop down arrow. Open it and from that menu choose IAM.
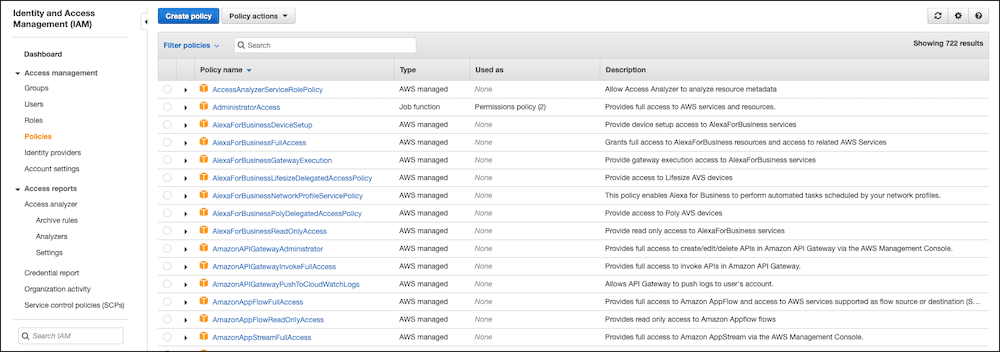
Now in the left hand menu you want to select policies. Once you have reached the policies page you want to hit the Create Policy that appears towards the top of the page.
Creating a policy is essentially defining permissions that you can then assign to an identity (user, group or roles.)
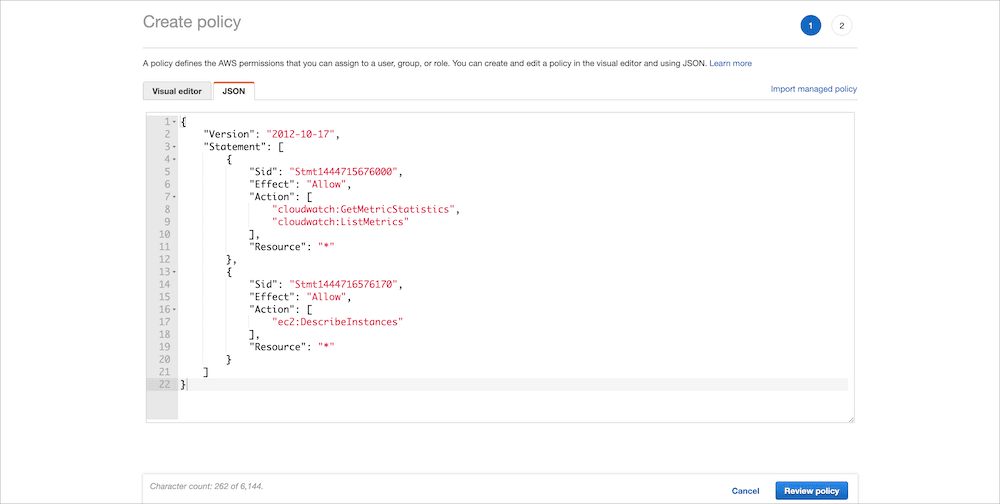
On the create policy screen choose the json tab and enter the following:
{
  "Version": "2012-10-17",
  "Statement": [
    {
      "Sid": "Stmt1444715676000",
      "Effect": "Allow",
      "Action": [
        "cloudwatch:GetMetricStatistics",
        "cloudwatch:ListMetrics"
      ],
      "Resource": "*"
    },
    {
      "Sid": "Stmt1444716576170",
      "Effect": "Allow",
      "Action": ["ec2:DescribeInstances"],
      "Resource": "*"
    }
  ]
}
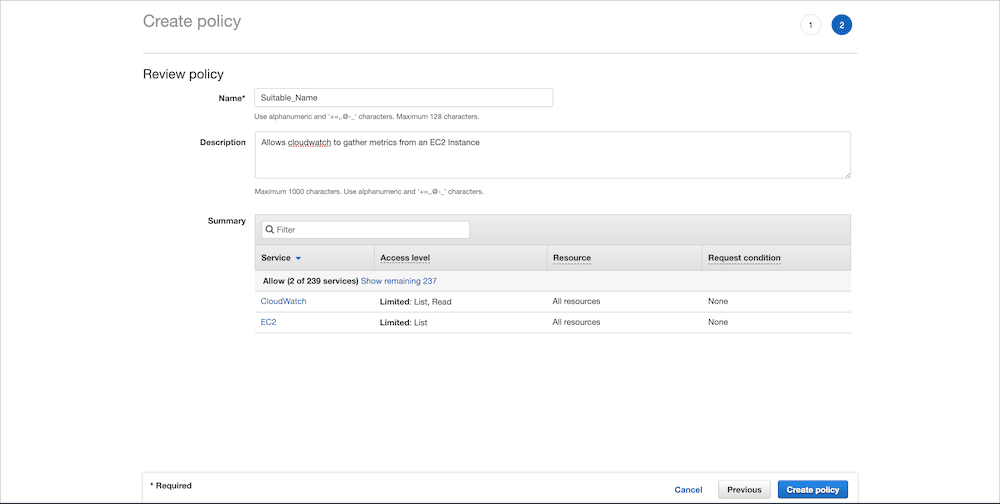
At the bottom of the page select review policy and finally on the next page you need to give your policy a name, now hit create policy.
Create IAM User
You are now going to need to create a new user so that you can attach the policy you created in step one, this will outline the responsibilities of this user.
While on the IAM page, in the left hand menu choose users.
Now at the top of the page select Add User.
Enter a username and make sure to check Programmatic Access, continue onto the next page of creation.

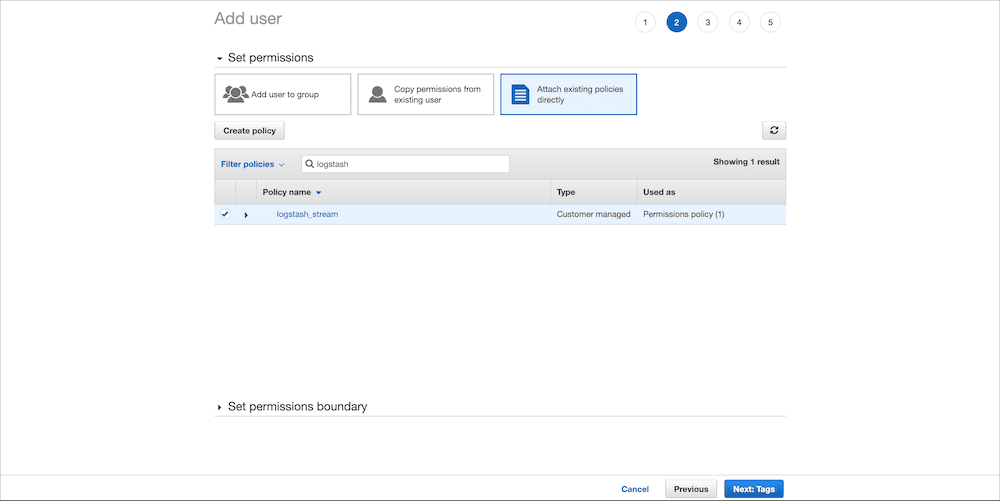
In the next section you want to attach an existing policy. Highlight attach existing policies and search the policy list below for your newly created policy.
Continue onwards to the next step, you can choose to set any Tags here but they aren't necessary. Continue onto the User Review, check all settings are correct and select create user.
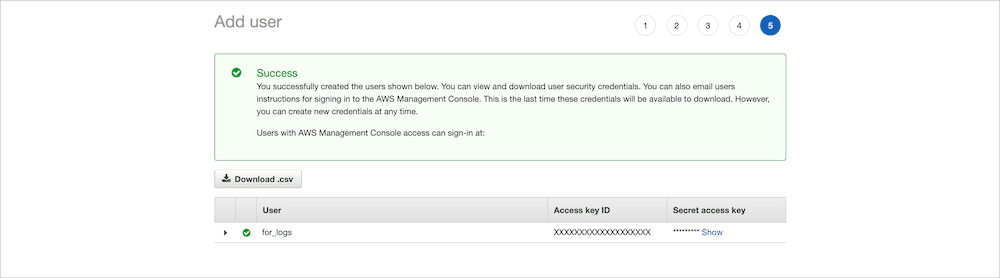
On the next screen you will be given your Access Key ID and Secret Access Key. You will need to make a note of these or alternatively download the .csv file provided.
Confirm EC2 Instance (Optional)
If you already have an EC2 Instance running you can skip this step.
The easiest way to for the new user to generate some data is to create an EC2 instance so that it can gather the metrics. Select the services drop down and look for EC2, it should come under the heading Compute. On the left hand menu select instances and choose to create a new instance and follow the steps provided.
Once you've created your instance you can move onto the next step.
Configure Logstash for Amazon EC2
To start sending logs and metrics from AWS to your Stack you need to configure an AWS Input on your Logit.io Stack.
Go to DashboardLogit.io will verify your input before it is applied, we will contact you to confirm when this has been completed.
Launch OpenSearch Dashboards to View Your Data
Launch OpenSearch DashboardsAmazon EC2 Overview
Sending data to Logit.io from Amazon EC2 instances is a seamless process that enhances your log and data management capabilities. Logit.io offers a robust platform for log analysis and monitoring, and integrating it with your Amazon EC2 instances can provide valuable insights into your application's performance and security. Another crucial element of this process is ensuring that your Amazon EC2 instances can efficiently handle incoming traffic. Amazon ELB Application (Elastic Load Balancer) plays a vital role in distributing traffic across your EC2 instances, the logs of this solution can also be ingested into the Logit.io platform. Additionally, for long-term storage and data backup, it's essential to consider our integration with Amazon S3 (Simple Storage Service). Storing your logs and data in Amazon S3 provides durability, scalability, and easy access to your historical data. By linking to these resources, you can access detailed information on optimizing your AWS environment for log analysis and data management. Logit.io's service for AWS logging (opens in a new tab) effortlessly incorporates these integrations for coordinated operations.