etcd
Ship your etcd Metrics via Telegraf to your Logit.io Stack
Follow the steps below to send your observability data to Logit.io
Metrics
Configure Telegraf to ship etcd metrics to your Logit.io stacks.
Install Integration
Install Telegraf
This integration allows you to configure a Telegraf agent to send your metrics to Logit.io.
Choose the installation method for your operating system:
When you paste the command below into Powershell it will download the Telegraf zip file.
Once that is complete, press Enter again and the zip file will be extracted into C:\Program Files\InfluxData\telegraf\telegraf-1.34.1.
wget https://dl.influxdata.com/telegraf/releases/telegraf-1.34.1_windows_amd64.zip -UseBasicParsing -OutFile telegraf-1.34.1_windows_amd64.zip
Expand-Archive .\telegraf-1.34.1_windows_amd64.zip -DestinationPath 'C:\Program Files\InfluxData\telegraf'
or in Powershell 7 use:
# Download the Telegraf ZIP file
Invoke-WebRequest -Uri "https://dl.influxdata.com/telegraf/releases/telegraf-1.34.1_windows_amd64.zip" `
                -OutFile "telegraf-1.34.1_windows_amd64.zip" `
                -UseBasicParsing

# Extract the contents of the ZIP file
Expand-Archive -Path ".\telegraf-1.34.1_windows_amd64.zip" `
            -DestinationPath "C:\Program Files\InfluxData\telegraf"
The default configuration file is location at:
C:\Program Files\InfluxData\telegraf\telegraf.conf
Configure the Telegraf input plugin
The configuration file below is pre-configured to scrape the system metrics from your hosts, add the following code to the configuration file telegraf.conf from the previous step.
# Read metrics from one or many prometheus clients
[[inputs.prometheus]]
  ## An array of urls to scrape metrics from.
  urls = ["http://localhost:9100/metrics"]

  ## Metric version controls the mapping from Prometheus metrics into
  ## Telegraf metrics.  When using the prometheus_client output, use the same
  ## value in both plugins to ensure metrics are round-tripped without
  ## modification.
  ##
  ##   example: metric_version = 1;
  ##            metric_version = 2; recommended version
  # metric_version = 1

  ## Url tag name (tag containing scrapped url. optional, default is "url")
  # url_tag = "url"

  ## Whether the timestamp of the scraped metrics will be ignored.
  ## If set to true, the gather time will be used.
  # ignore_timestamp = false

  ## An array of Kubernetes services to scrape metrics from.
  # kubernetes_services = ["http://my-service-dns.my-namespace:9100/metrics"]

  ## Kubernetes config file to create client from.
  # kube_config = "/path/to/kubernetes.config"

  ## Scrape Kubernetes pods for the following prometheus annotations:
  ## - prometheus.io/scrape: Enable scraping for this pod
  ## - prometheus.io/scheme: If the metrics endpoint is secured then you will need to
  ##     set this to 'https' & most likely set the tls config.
  ## - prometheus.io/path: If the metrics path is not /metrics, define it with this annotation.
  ## - prometheus.io/port: If port is not 9102 use this annotation
  # monitor_kubernetes_pods = true

  ## Get the list of pods to scrape with either the scope of
  ## - cluster: the kubernetes watch api (default, no need to specify)
  ## - node: the local cadvisor api; for scalability. Note that the config node_ip or the environment variable NODE_IP must be set to the host IP.
  # pod_scrape_scope = "cluster"

  ## Only for node scrape scope: node IP of the node that telegraf is running on.
  ## Either this config or the environment variable NODE_IP must be set.
  # node_ip = "10.180.1.1"

  ## Only for node scrape scope: interval in seconds for how often to get updated pod list for scraping.
  ## Default is 60 seconds.
  # pod_scrape_interval = 60

  ## Restricts Kubernetes monitoring to a single namespace
  ##   ex: monitor_kubernetes_pods_namespace = "default"
  # monitor_kubernetes_pods_namespace = ""
  # label selector to target pods which have the label
  # kubernetes_label_selector = "env=dev,app=nginx"
  # field selector to target pods
  # eg. To scrape pods on a specific node
  # kubernetes_field_selector = "spec.nodeName=$HOSTNAME"

  ## Scrape Services available in Consul Catalog
  # [inputs.prometheus.consul]
  #   enabled = true
  #   agent = "http://localhost:8500"
  #   query_interval = "5m"

  #   [[inputs.prometheus.consul.query]]
  #     name = "a service name"
  #     tag = "a service tag"
  #     url = 'http://\{\{if ne .ServiceAddress ""\}\}\{\{.ServiceAddress\}\}\{\{.Address\}\}:\{\{.ServicePort\}\}/\{\{.\}\}metrics'
  #     [inputs.prometheus.consul.query.tags]
  #       host = "\{\{.Node\}\}"

  ## Use bearer token for authorization. ('bearer_token' takes priority)
  # bearer_token = "/path/to/bearer/token"
  ## OR
  # bearer_token_string = "abc_123"

  ## HTTP Basic Authentication username and password. ('bearer_token' and
  ## 'bearer_token_string' take priority)
  # username = ""
  # password = ""

  ## Specify timeout duration for slower prometheus clients (default is 3s)
  # response_timeout = "3s"

  ## Optional TLS Config
  # tls_ca = /path/to/cafile
  # tls_cert = /path/to/certfile
  # tls_key = /path/to/keyfile

  ## Use TLS but skip chain & host verification
  # insecure_skip_verify = false
Read more about how to configure data scraping and configuration options for Prometheus (opens in a new tab)
Configure The Output plugin
Once you have generated the configuration file, you need to set up the output plug-in to allow Telegraf to transmit your data to Logit.io in Prometheus format. This can be accomplished by incorporating the following code into your configuration file:
[[outputs.http]]
  url = "https://@metricsUsername:@metricsPassword@@metrics_id-vm.logit.io:@vmAgentPort/api/v1/write"
  data_format = "prometheusremotewrite"

  [outputs.http.headers]
    Content-Type = "application/x-protobuf"
    Content-Encoding = "snappy"
Start Telegraf
From the location where Telegraf was installed (C:\Program Files\InfluxData\telegraf\telegraf-1.34.1) run the program
providing the chosen configuration file as a parameter:
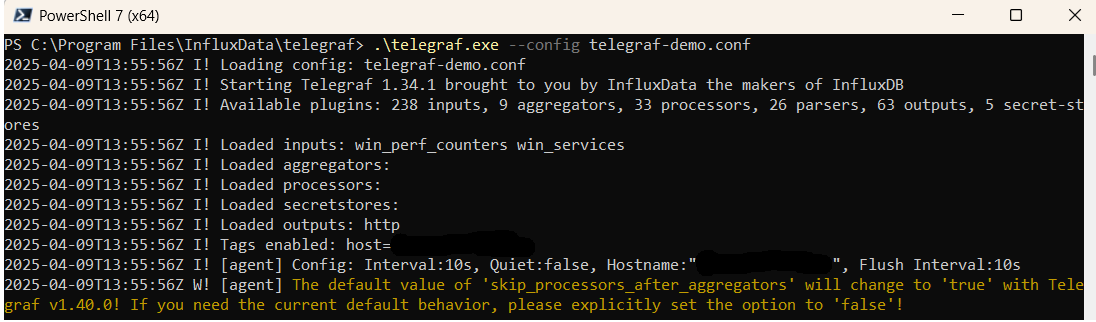
.\telegraf.exe --config telegraf.confOnce Telegraf is running you should see output similar to the following, which confirms the inputs, output and basic configuration the application has been started with:
Launch Grafana to View Your Data
Launch GrafanaHow to diagnose no data in Stack
If you don't see data appearing in your stack after following this integration, take a look at the troubleshooting guide for steps to diagnose and resolve the problem or contact our support team and we'll be happy to assist.
Telegraf etcd metrics Overview
etcd is a crucial distributed key-value store that plays an essential role in maintaining the configuration data, state data, and metadata for distributed systems. To effectively monitor and analyze etcd metrics in a distributed environment, organizations need a reliable and efficient metrics management solution. Telegraf, an open-source metrics collection agent, is the ideal tool for gathering etcd metrics from multiple sources, including etcd instances, operating systems, databases, and applications.
With a wide range of input plugins, Telegraf enables organizations to collect diverse etcd metrics, including client traffic, server message counts, backend commit times, and more. These metrics provide valuable insights into the performance and health of etcd instances, enabling organizations to optimize their distributed storage infrastructure.
For storing and querying the collected etcd metrics, Prometheus, a robust open-source monitoring and alerting tool, is the preferred choice. Prometheus supports a flexible querying language and graphical visualization capabilities, enabling organizations to gain actionable insights. By configuring Telegraf to output etcd metrics in the Prometheus format and setting up Prometheus to scrape the metrics from the Telegraf server, seamless integration is achieved.
This process involves configuring Telegraf to collect etcd metrics, formatting them in the Prometheus format, and setting up Prometheus to scrape the metrics from the Telegraf server. Leveraging Prometheus's advanced querying and visualization features, organizations can gain deep insights into distributed key-value store performance, identify bottlenecks, and troubleshoot issues effectively.
By leveraging Telegraf to ship etcd metrics to Prometheus, organizations establish a reliable and efficient metrics management solution for their distributed environments. This empowers them to monitor etcd performance, optimize their distributed storage infrastructure, and make data-driven decisions to ensure optimal system health and performance.
If you need any further assistance with shipping your log data to Logit.io we're here to help you get started. Feel free to get in contact with our support team by sending us a message via live chat & we'll be happy to assist.