JTI OpenConfig
Ship your JTI OpenConfig Metrics via Telegraf to your Logit.io Stack
Follow the steps below to send your observability data to Logit.io
Metrics
Configure Telegraf to ship JTI OpenConfig metrics to your Logit.io stacks.
Install Integration
Install Telegraf
This integration allows you to configure a Telegraf agent to send your metrics to Logit.io.
Choose the installation method for your operating system:
When you paste the command below into Powershell it will download the Telegraf zip file.
Once that is complete, press Enter again and the zip file will be extracted into C:\Program Files\InfluxData\telegraf\telegraf-1.34.1.
wget https://dl.influxdata.com/telegraf/releases/telegraf-1.34.1_windows_amd64.zip -UseBasicParsing -OutFile telegraf-1.34.1_windows_amd64.zip
Expand-Archive .\telegraf-1.34.1_windows_amd64.zip -DestinationPath 'C:\Program Files\InfluxData\telegraf'
or in Powershell 7 use:
# Download the Telegraf ZIP file
Invoke-WebRequest -Uri "https://dl.influxdata.com/telegraf/releases/telegraf-1.34.1_windows_amd64.zip" `
                -OutFile "telegraf-1.34.1_windows_amd64.zip" `
                -UseBasicParsing

# Extract the contents of the ZIP file
Expand-Archive -Path ".\telegraf-1.34.1_windows_amd64.zip" `
            -DestinationPath "C:\Program Files\InfluxData\telegraf"
The default configuration file is location at:
C:\Program Files\InfluxData\telegraf\telegraf.conf
Configure Telegraf
The configuration file below is pre-configured to scrape the system metrics from your hosts, add the following code to the configuration file telegraf.conf from the previous step.
### Subscribe and receive OpenConfig Telemetry data using JTI
[[inputs.jti_openconfig_telemetry]]
  ## List of device addresses to collect telemetry from
  servers = ["localhost:1883"]

  ## Authentication details. Username and password are must if device expects
  ## authentication. Client ID must be unique when connecting from multiple instances
  ## of telegraf to the same device
  username = "user"
  password = "pass"
  client_id = "telegraf"

  ## Frequency to get data
  sample_frequency = "1000ms"

  ## Sensors to subscribe for
  ## A identifier for each sensor can be provided in path by separating with space
  ## Else sensor path will be used as identifier
  ## When identifier is used, we can provide a list of space separated sensors.
  ## A single subscription will be created with all these sensors and data will
  ## be saved to measurement with this identifier name
  sensors = [
  "/interfaces/",
  "collection /components/ /lldp",
  ]

  ## We allow specifying sensor group level reporting rate. To do this, specify the
  ## reporting rate in Duration at the beginning of sensor paths / collection
  ## name. For entries without reporting rate, we use configured sample frequency
  #sensors = [
  #"1000ms customReporting /interfaces /lldp",
  #"2000ms collection /components",
  #"/interfaces",
  #]

  ## Timestamp Source
  ## Set to 'collection' for time of collection, and 'data' for using the time
  ## provided by the _timestamp field.
  # timestamp_source = "collection"

  ## Optional TLS Config
  # enable_tls = false
  # tls_ca = "/etc/telegraf/ca.pem"
  # tls_cert = "/etc/telegraf/cert.pem"
  # tls_key = "/etc/telegraf/key.pem"
  ## Minimal TLS version to accept by the client
  # tls_min_version = "TLS12"
  ## Use TLS but skip chain & host verification
  # insecure_skip_verify = false

  ## Delay between retry attempts of failed RPC calls or streams. Defaults to 1000ms.
  ## Failed streams/calls will not be retried if 0 is provided
  retry_delay = "1000ms"

  ## To treat all string values as tags, set this to true
  str_as_tags = false

### System metrics
[[inputs.disk]]
[[inputs.net]]
[[inputs.mem]]
[[inputs.system]]
[[inputs.cpu]]
  percpu = false
  totalcpu = true
  collect_cpu_time = true
  report_active = true

### Output
[[outputs.http]]
  url = "https://@metricsUsername:@metricsPassword@@metrics_id-vm.logit.io:@vmAgentPort/api/v1/write"
  data_format = "prometheusremotewrite"

  [outputs.http.headers]
    Content-Type = "application/x-protobuf"
    Content-Encoding = "snappy"
Read more about how to configure data scraping and configuration options for JTI OpenConfig (opens in a new tab)
Start Telegraf
From the location where Telegraf was installed (C:\Program Files\InfluxData\telegraf\telegraf-1.34.1) run the program
providing the chosen configuration file as a parameter:
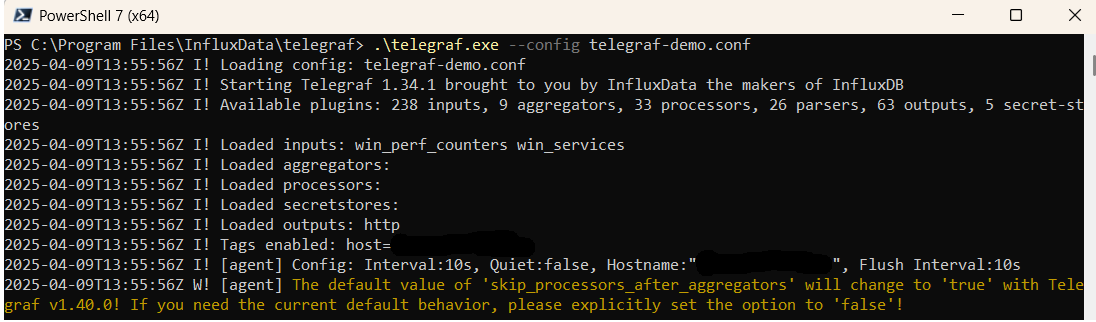
.\telegraf.exe --config telegraf.confOnce Telegraf is running you should see output similar to the following, which confirms the inputs, output and basic configuration the application has been started with:
Launch Grafana to View Your Data
Launch GrafanaHow to diagnose no data in Stack
If you don't see data appearing in your stack after following this integration, take a look at the troubleshooting guide for steps to diagnose and resolve the problem or contact our support team and we'll be happy to assist.
Telegraf JTI OpenConfig Overview
In order to effectively monitor and analyze JTI OpenConfig metrics across a distributed environment, it's essential to have a robust and efficient metrics management solution. Telegraf, an open-source server agent for collecting and reporting metrics, fits this requirement well. It can gather JTI OpenConfig metrics from numerous sources such as operational routers and switches, databases, and other relevant applications.
Telegraf features a wide range of input plugins, enabling users to collect metrics from various sources such as CPU usage, memory utilization, network traffic, and more, all critical to understanding JTI OpenConfig performance. To store and scrutinize these collected metrics, organizations can utilize Prometheus, an open-source monitoring and alerting toolkit known for its flexible querying language and powerful data visualization capabilities.
To relay JTI OpenConfig metrics from Telegraf to Prometheus, organizations need to configure Telegraf to output metrics in the Prometheus format, and then set up Prometheus to scrape these metrics from the Telegraf server. This process includes setting up Telegraf to gather JTI OpenConfig metrics, outputting them in the Prometheus format, configuring Prometheus to retrieve these metrics from the Telegraf server, and then visually interpreting the data using Prometheus's dynamic querying and graphical visualization tools.
Once the metrics are successfully integrated into Prometheus, further analysis and visualization can be carried out using Grafana. Grafana, a leading open-source platform recognized for its monitoring and observability capabilities, is fully compatible with Prometheus. It allows users to create dynamic, interactive dashboards for an in-depth look at the metrics data, providing a comprehensive understanding of performance trends and potential issues in the JTI OpenConfig system.
If you need any further assistance with shipping your log data to Logit.io we're here to help you get started. Feel free to get in contact with our support team by sending us a message via live chat & we'll be happy to assist.