
Getting Started, How To Guides, ELK
7 min read
Last updated:
Learn how to change the status of a text field from non-aggregatable to aggregatable.
Firstly, If you would like to find out why you may want to make a text field aggregatable please click here.
Contents
How do I check if a field is aggregatable?
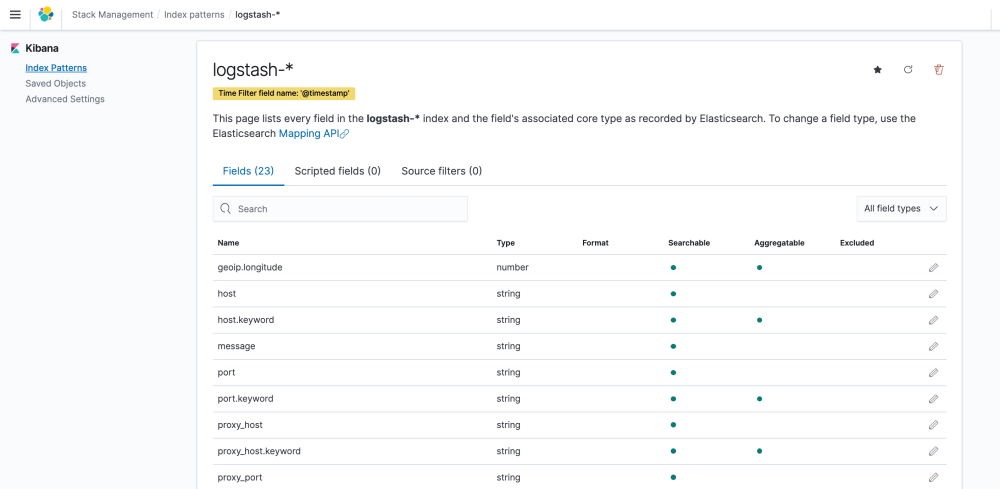
To check if a field is aggregatable open Kibana choose the 'Management' option on the left hand side menu and then choose 'index patterns'. If there is a check / circle under the aggregatable column then this means the field is aggregated.
How do I make a field aggregatable?
1. Select a field
First you need to choose a field. For this example I've opted to use the message field, as you can see in the image below the message field is not aggregated.
Now you need to find out what index pattern this particular message field appears under. As you're on the index pattern page you'll be able to view the index pattern at the top of the page. The Logstash-* index pattern is being used in the example above.
2. Fetching the templates
The second part requires the use of the 'Kibana Dev Tools' section, select the wrench tool icon on the Kibana menu and run the following command in the dev tools section. You can also use the Elasticsearch API to get the templates, but in this example you'll be using 'Kibana Dev Tools'.
GET _cat/templates
This will return the names of the templates currently in Elasticsearch and Kibana. The name of the template required in the example is Logstash. So now on a new line in Kibana Dev Tools you're going to run the following command.
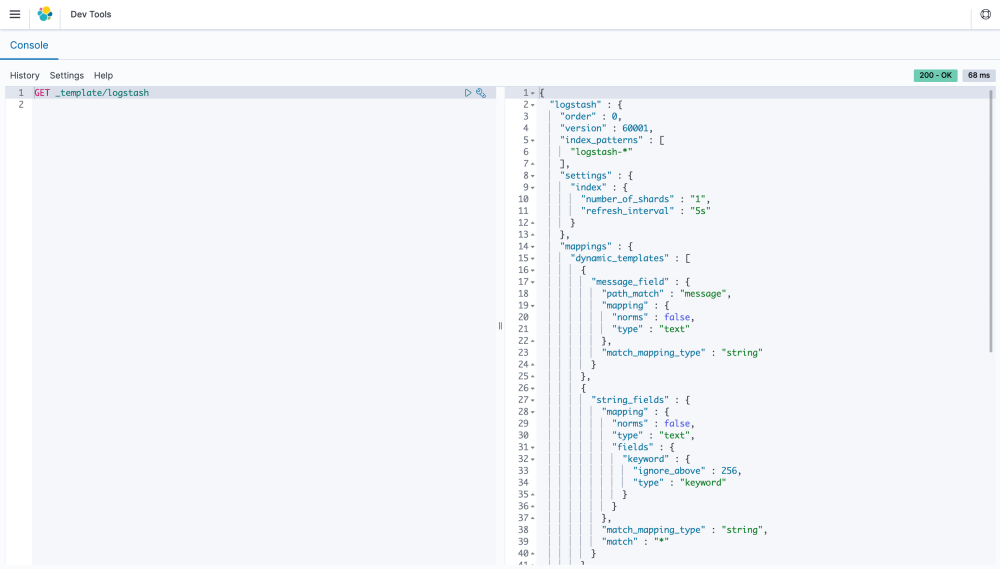
GET _template/logstash
Running this command will fetch the Logstash index template which can be seen below.
{
    "order" : 0,
    "version" : 60001,
    "index_patterns" : [
      "logstash-*"
    ],
    "settings" : {
      "index" : {
        "refresh_interval" : "5s"
      }
    },
    "mappings" : {
      "_default_" : {
        "dynamic_templates" : [
          {
            "message_field" : {
              "path_match" : "message",
              "match_mapping_type" : "string",
              "mapping" : {
                "type" : "text",
                "norms" : false,
              }
            }
          },
          {
            "string_fields" : {
              "match" : "*",
              "match_mapping_type" : "string",
              "mapping" : {
                "type" : "text",
                "norms" : false,
                "fields" : {
                  "keyword" : {
                    "type" : "keyword",
                    "ignore_above" : 256
                  }
                }
              }
            }
          }
        ],
        "properties" : {
          "@timestamp" : {
            "type" : "date"
          },
          "@version" : {
            "type" : "keyword"
          },
          "geoip" : {
            "dynamic" : true,
            "properties" : {
              "ip" : {
                "type" : "ip"
              },
              "location" : {
                "type" : "geo_point"
              },
              "latitude" : {
                "type" : "half_float"
              },
              "longitude" : {
                "type" : "half_float"
              }
            }
          }
        }
      }
    },
    "aliases" : { }
  }
3. Creating a keyword field
In the template above find the "message_field" section. You can see that the current mapping type is text, you can't aggregate on a text field type. You need a keyword field type in order to aggregate.
The easiest way to change the mapping type of the field is to input a new template. Copy the template above into a text editor and convert the "message_field" to a keyword. You can do this by adding the next code snippet to the message field.
"fields" : {
	"keyword" : {
		"ignore_above" : 2048,
		"type" : "keyword"
	}
}
The message field mapping should now look like this:
"mappings" : {
          "_default_" : {
            "dynamic_templates" : [
              {
                "message_field" : {
                  "path_match" : "message",
                  "match_mapping_type" : "string",
                  "mapping" : {
                    "type" : "text",
                    "norms" : false,
                    "fields" : {
                      "keyword" : {
                        "type" : "keyword",
                        "ignore_above" : 2048
                      }
                    }
                  }
                }
              },
(mappings __default__ has been deprecated in version 7 and in newer versions this appears as follows:

        "mappings" : {
            "dynamic_templates" : [
You need to set a reasonable size on 'ignore above' so not to impact performance. Most messages are smaller than 1500 characters, but they may grow. In this example you have allowed up to 2048 total characters, longer messages will be ignored.
4. Changing the template order
You also need to change the order of the template to make sure it gets applied to the message field. If you change the order number to 4 it will have the highest order number out of all of the templates. This means it will be the top level template that gets applied. The way orders work for templates is that the lowest order number gets applied first and the higher number sits on top of that. So a template with an order number 0 would be applied first, then an order number of 1 would be applied second, an order number of 4 would sit above both of those and be applied as the top-level template. Go ahead and change the order to have the value of 4.
PUT _template/logstash_msg_keyword
{
    "order" : 4,
    "version" : 60001,
    "index_patterns" : [
      "logstash-*"
5. Putting a new template into Kibana
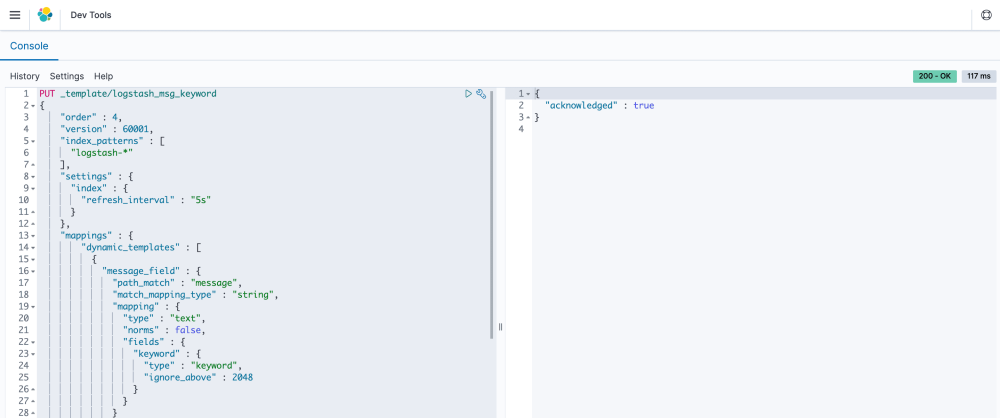
Copy the new template as it is ready to be added. Before you paste the template into Kibana. You need to first add the following line into 'Kibana Dev Tools.' This tells Kibana you're going to input a new template and name it logstash_msg_keyword.
PUT _template/logstash_msg_keyword
On a new line in 'Kibana Dev Tools' paste the new template. You should have something similar to the below section.
PUT _template/logstash_msg_keyword
{
    "order" : 4,
    "version" : 60001,
    "index_patterns" : [
      "logstash-*"
    ],
    "settings" : {
      "index" : {
        "refresh_interval" : "5s"
      }
    },
    "mappings" : {
      "_default_" : {
        "dynamic_templates" : [
          {
            "message_field" : {
              "path_match" : "message",
              "match_mapping_type" : "string",
              "mapping" : {
                "type" : "text",
                "norms" : false,
                "fields" : {
                  "keyword" : {
                    "type" : "keyword",
                    "ignore_above" : 2048
                  }
                }
              }
            }
          },
          {
            "string_fields" : {
              "match" : "*",
              "match_mapping_type" : "string",
              "mapping" : {
                "type" : "text",
                "norms" : false,
                "fields" : {
                  "keyword" : {
                    "type" : "keyword",
                    "ignore_above" : 256
                  }
                }
              }
            }
          }
        ],
        "properties" : {
          "@timestamp" : {
            "type" : "date"
          },
          "@version" : {
            "type" : "keyword"
          },
          "geoip" : {
            "dynamic" : true,
            "properties" : {
              "ip" : {
                "type" : "ip"
              },
              "location" : {
                "type" : "geo_point"
              },
              "latitude" : {
                "type" : "half_float"
              },
              "longitude" : {
                "type" : "half_float"
              }
            }
          }
        }
      }
    },
    "aliases" : { }
}
6. Send test data with a date in the future
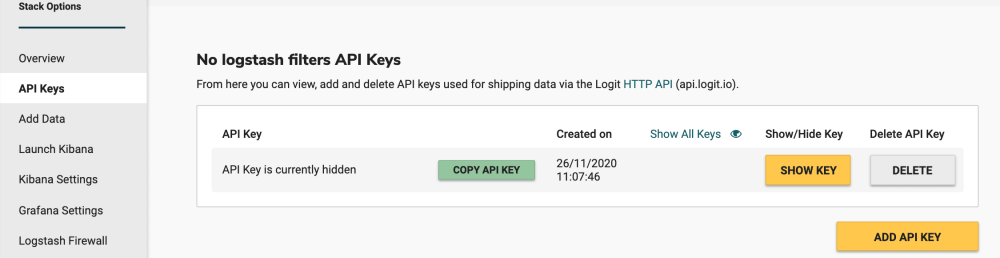
Templates are applied on index creation, as data is likely to already have been sent to the ELK stack today. You need to use a future index creation. This can be achieved by using a date in the future for example 1/1/2030. You can then use your stacks api key to send data from command line into the stack. This can be found on the 'Stack Details' page of the Logit.io Dashboard.
curl -i -H "ApiKey: <your-stack-api-key>" -i -H "Content-Type: application/json" -H "LogType: default" https://api.logit.io/v2 -d '{"message":"Logit.io Test Log", "@timestamp":"2030-01-01T11:00:0.000Z"}'
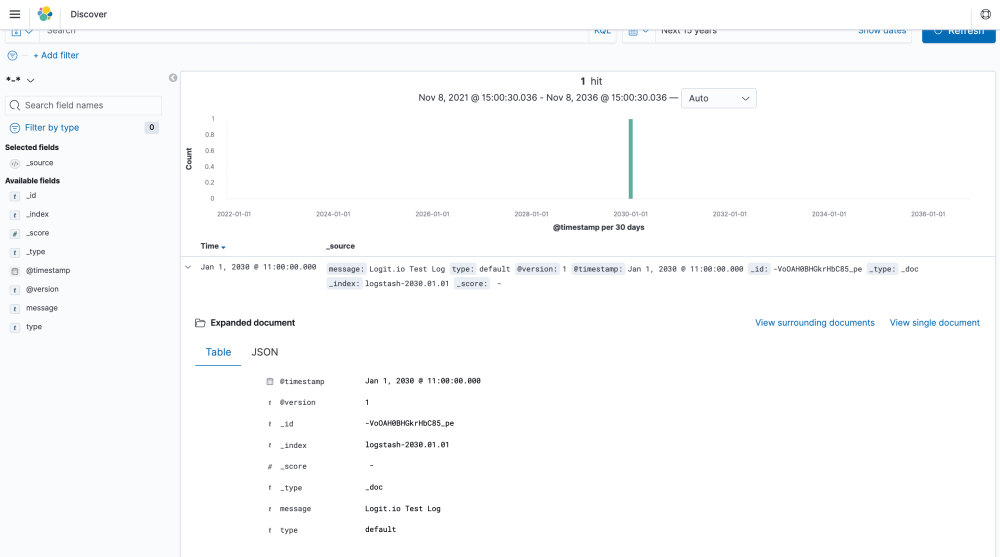
7. Confirm the results
Once you have confirmed data has arrived in to your stack. On Kibana you need to go the management tab, select index patterns, refresh the index field list and search for the message.keyword field, check whether the field is now aggregatable.
We hope that you enjoyed this tutorial, if you want to brush up on your knowledge of Elasticsearch even more then our list of ELK interview questions should answer every common query that you may have.
If you want to continue learning about Kibana specifically then why not review our KQL cheat sheet that covers most of the common queries you’ll encounter.
If you enjoyed this post on how to make a text field aggregatable then why not check out our tutorial on the ELK Stack.