Google Kubernetes Engine Logs
Ship Google Kubernetes Engine Logs to Logstash
Follow the steps below to send your observability data to Logit.io
Logs
Filebeat is an open source shipping agent that lets you ship Google Kubernetes Engine (GKE) Logs to one or more destinations, including Logstash.
Install Integration
Configure GKE
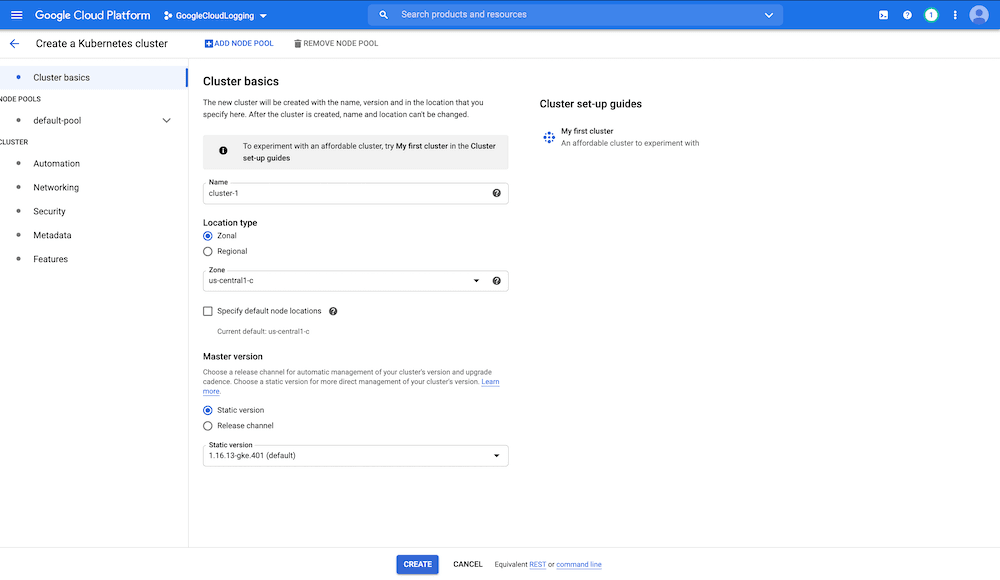
Open Google Kubernetes Engine (opens in a new tab) in Google Cloud, choose to create a cluster, give it a suitable name, and choose a region for your cluster.
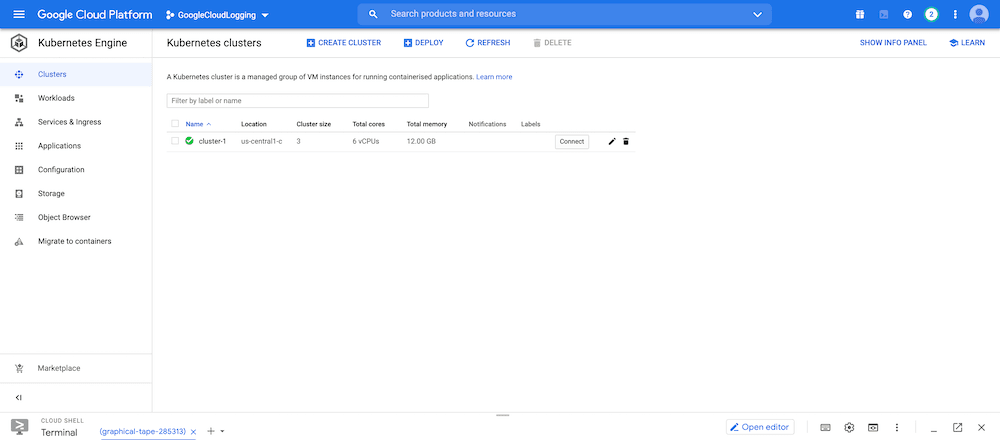
Connecting to the cluster
Once the cluster is created you will see a similar screen to the below. Go ahead and hit Connect.
You'll have two options, we're going to choose to Run in Google Cloud Shell.
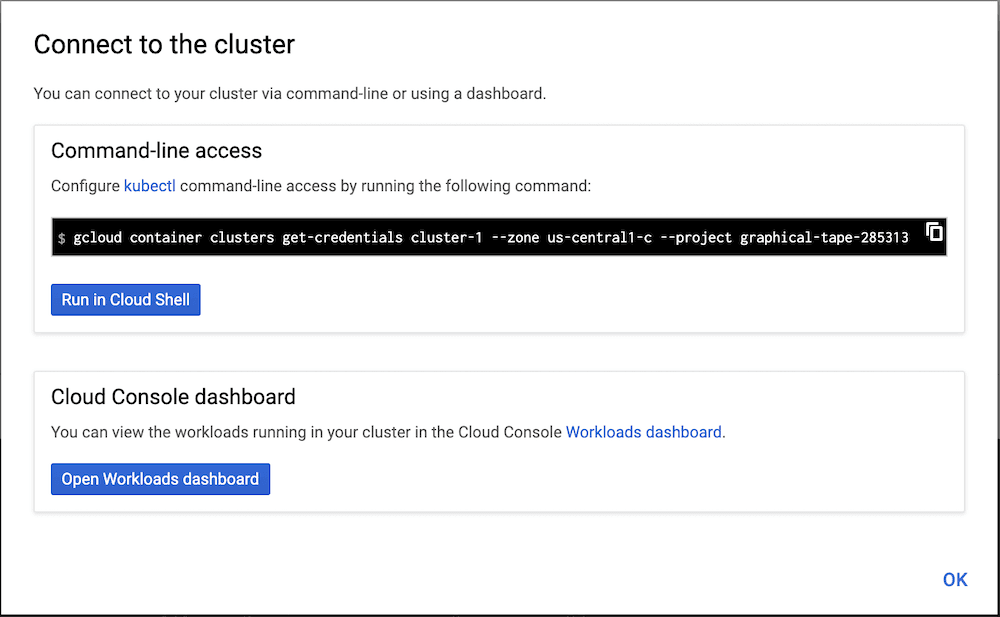
This will open a terminal window in your browser. (It can take a few seconds to load)

Setting up the terminal
You'll have to run the initial command that comes pre-populated in the terminal to authenticate. Wait a few seconds for this to process and then you're going to download the following Logit.io Filebeat Kubernetes deployment manifest.
To download the Logit.io deployment manifest for GKE, in the GKE terminal run:
wget cdn.logit.io/filebeat-kubernetes.yamlDeploy Filebeat
Now you have the manifest we need to add your Stack Logstash endpoint details.
Open the filebeat-kubernetes.yaml file in a text editor.
vi filebeat-kubernetes.yamlor
nano filebeat-kubernetes.yamlUpdate the following lines (line 59) in the yaml with your Stack Logstash endpoint and Beats-SSL port.
The code snippet occurs two times in the yaml file and needs updating in both.
env:
  - name: LOGSTASH_HOST
    value: "guid-ls.logit.io"
  - name: BEATS_PORT
    value: "00000"
After updating the code should look as below.
env:
  - name: LOGSTASH_HOST
    value: ["@logstash.host"]
  - name: BEATS_PORT
    value: ["@logstash.sslPort"]
Exit and save the file.
Apply your updates
Now we're going to apply the file to the cluster.
kubectl apply -f filebeat-kubernetes.yamlIf you need to apply further updates after running the apply command you may need to remove the yaml file, make your changes and then apply again.
Confirm Deployment
Confirm your pod has deployed, you should see output similar to that below.
kubectl --namespace=kube-system get ds/filebeatBrowse to Kibana and you should see Logs arriving in your Stack.
In the GKE console you can view the log file to confirm that Logs are being sent to your Logit.io Stack using the following command.
kubectl logs ["podname"] --namespace=kube-systemLaunch OpenSearch Dashboards to View Your Data
Launch OpenSearch DashboardsHow to diagnose no data in Stack
If you don't see data appearing in your stack after following this integration, take a look at the troubleshooting guide for steps to diagnose and resolve the problem or contact our support team and we'll be happy to assist.
GKE Logging Overview
Google Kubernetes Engine (GKE) Logs are integral for monitoring and managing applications deployed on GKE. This platform, built on the open-source Kubernetes system, facilitates efficient container orchestration, allowing users to automate the deployment, scaling, and operations of containerized applications across clusters of hosts.
GKE provides comprehensive logging capabilities that are crucial for real-time and post-mortem analysis. Logs in GKE are managed through integration with Google's Cloud Logging, making it straightforward to maintain, search, and analyze log data from all containers and nodes within your clusters.
The logs collected by GKE include data from the Kubernetes master and worker nodes, giving developers and system administrators clear insights into the system's behavior and the health of their applications. These logs are crucial for troubleshooting issues, optimizing resource usage, and ensuring compliance with security and audit requirements.
Sending logs to Logit.io from Google Kubernetes Engine (GKE) is a streamlined process that empowers organizations to gain valuable insights into their containerized applications. The integration between GKE and Logit.io simplifies the collection and analysis of logs, ensuring centralized visibility and real-time monitoring for your container orchestration environment. Logit.io's service for GCP logging (opens in a new tab) includes integrations that work in tandem.