Google Workflows Metrics
Ship your Google Workflows Metrics via Telegraf to your Logit.io Stack
Follow the steps below to send your observability data to Logit.io
Metrics
Configure Telegraf to ship Google Workflows metrics to your Logit.io stacks via Logstash.
Install Integration
Set Credentials in GCP
@intro
-
Begin by heading over to the 'Project Selector' (opens in a new tab) and select the specific project from which you wish to send metrics.
- Progress to the 'Service Account Details' screen. Here, assign a distinct name to your service account and opt for 'Create and Continue'.
- In the 'Grant This Service Account Access to Project' screen, ensure the following roles: 'Compute Viewer', 'Monitoring Viewer', and 'Cloud Asset Viewer'.
- Upon completion of the above, click 'Done'.
- Now find and select your project in the 'Service Accounts for Project' list.
- Move to the 'KEYS' section.
- Navigate through Keys > Add Key > Create New Key, and specify 'JSON' as the key type.
- Lastly, click on 'Create', and make sure to save your new key.
Now add the environment variable for the key
On the machine run:
export GOOGLE_APPLICATION_CREDENTIALS=<your-gcp-key>
Install Telegraf
This integration allows you to configure a Telegraf agent to send your metrics to Logit.io.
Choose the installation method for your operating system:
When you paste the command below into Powershell it will download the Telegraf zip file.
Once that is complete, press Enter again and the zip file will be extracted into C:\Program Files\InfluxData\telegraf\telegraf-1.34.1.
wget https://dl.influxdata.com/telegraf/releases/telegraf-1.34.1_windows_amd64.zip -UseBasicParsing -OutFile telegraf-1.34.1_windows_amd64.zip
Expand-Archive .\telegraf-1.34.1_windows_amd64.zip -DestinationPath 'C:\Program Files\InfluxData\telegraf'
or in Powershell 7 use:
# Download the Telegraf ZIP file
Invoke-WebRequest -Uri "https://dl.influxdata.com/telegraf/releases/telegraf-1.34.1_windows_amd64.zip" `
                -OutFile "telegraf-1.34.1_windows_amd64.zip" `
                -UseBasicParsing

# Extract the contents of the ZIP file
Expand-Archive -Path ".\telegraf-1.34.1_windows_amd64.zip" `
            -DestinationPath "C:\Program Files\InfluxData\telegraf"
The default configuration file is location at:
C:\Program Files\InfluxData\telegraf\telegraf.conf
Configure the Telegraf input plugin
First you need to set up the input plug-in to enable Telegraf to scrape the GCP data from your hosts. This can be accomplished by incorporating the following code into your configuration file:
# Gather timeseries from Google Cloud Platform v3 monitoring API
[[inputs.stackdriver]]
  ## GCP Project
  project = "<your-project-name>"

  ## Include timeseries that start with the given metric type.
  metric_type_prefix_include = [
	"@metric_type",
  ]

  ## Most metrics are updated no more than once per minute; it is recommended
  ## to override the agent level interval with a value of 1m or greater.
  interval = "1m"
Read more about how to configure data scraping and configuration options for Stackdriver (opens in a new tab)
Configure the output plugin
Once you have generated the configuration file, you need to set up the output plug-in to allow Telegraf to transmit your data to Logit.io in Prometheus format. This can be accomplished by incorporating the following code into your configuration file:
[[outputs.http]]
  url = "https://@metricsUsername:@metricsPassword@@metrics_id-vm.logit.io:@vmAgentPort/api/v1/write"
  data_format = "prometheusremotewrite"

  [outputs.http.headers]
    Content-Type = "application/x-protobuf"
    Content-Encoding = "snappy"
Start Telegraf
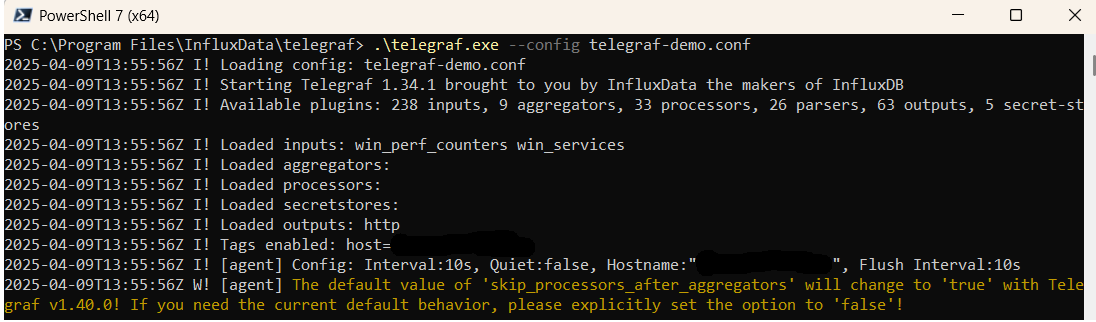
From the location where Telegraf was installed (C:\Program Files\InfluxData\telegraf\telegraf-1.34.1) run the program
providing the chosen configuration file as a parameter:
.\telegraf.exe --config telegraf.confOnce Telegraf is running you should see output similar to the following, which confirms the inputs, output and basic configuration the application has been started with:
Launch Grafana to View Your Data
Launch GrafanaHow to diagnose no data in Stack
If you don't see data appearing in your stack after following this integration, take a look at the troubleshooting guide for steps to diagnose and resolve the problem or contact our support team and we'll be happy to assist.
Telegraf Google Workflows Platform metrics Overview
Telegraf, developed by InfluxData, is a versatile open-source server agent capable of collecting metrics and data from a broad spectrum of sources. Among its various integrations is support for Google Workflows, a managed service offered by Google Cloud that orchestrates and automates Google Cloud and HTTP-based API services with serverless workflows. Google Workflows allows developers to build and deploy applications that integrate services within Google Cloud and external systems, streamlining complex processes into scalable, reliable automation sequences.
Integrating Telegraf with Google Workflows enables organizations to monitor the execution and performance of their workflows in real-time. This capability is crucial for developers and operations teams to ensure their automated processes run smoothly and efficiently, facilitating operational reliability and optimizing resource utilization. Monitoring metrics such as workflow execution times, success and error rates, and resource consumption are essential for identifying bottlenecks, debugging issues, and improving the overall performance of automated processes.
With Logit.io, businesses can enhance their monitoring and analytics capabilities for Google Workflows, enabling them to proactively manage their automated processes, quickly resolve issues, and optimize the performance of their workflows. The platform's advanced analytics and visualization tools support informed decision-making, helping users to maintain high-quality, efficient, and reliable automation sequences.
To further enhance your log management strategy, it's valuable to explore our complementary integrations for the Google Cloud ecosystem. The Google API Gateway integration allows seamless communication between your applications and Logit.io. Additionally, the Google VM Manager integration empowers you to efficiently manage and scale virtual machines in your cloud infrastructure, ensuring the optimal performance of your applications. Logit.io's GCP logging (opens in a new tab) also offers integrations that seamlessly enhance functionality.