How do I enable OKTA SSO (Single Sign-On) for my Logit.io account?
What is OKTA SSO (Single Sign-On?)
OKTA SSO allows a user to authenticate in OKTA and then be able to seamlessly sign into Logit.io. With OKTA settings added to your Logit.io account, it means your users will have a seamless experience where they can sign in once and will have access to your own products and applications as well as Logit.io too. Using Logit.io with OKTA enabled will help you stay on top of the constantly growing compliance requirements such as ISO 27001, SOC2, GDPR, PCI & Cyber Essentials Compliance.
Configure OKTA
You will need to sign into your OKTA account and then go to the Admin area.
From the left-side menu select Applications -> Applications and then click the Create App Integration button.

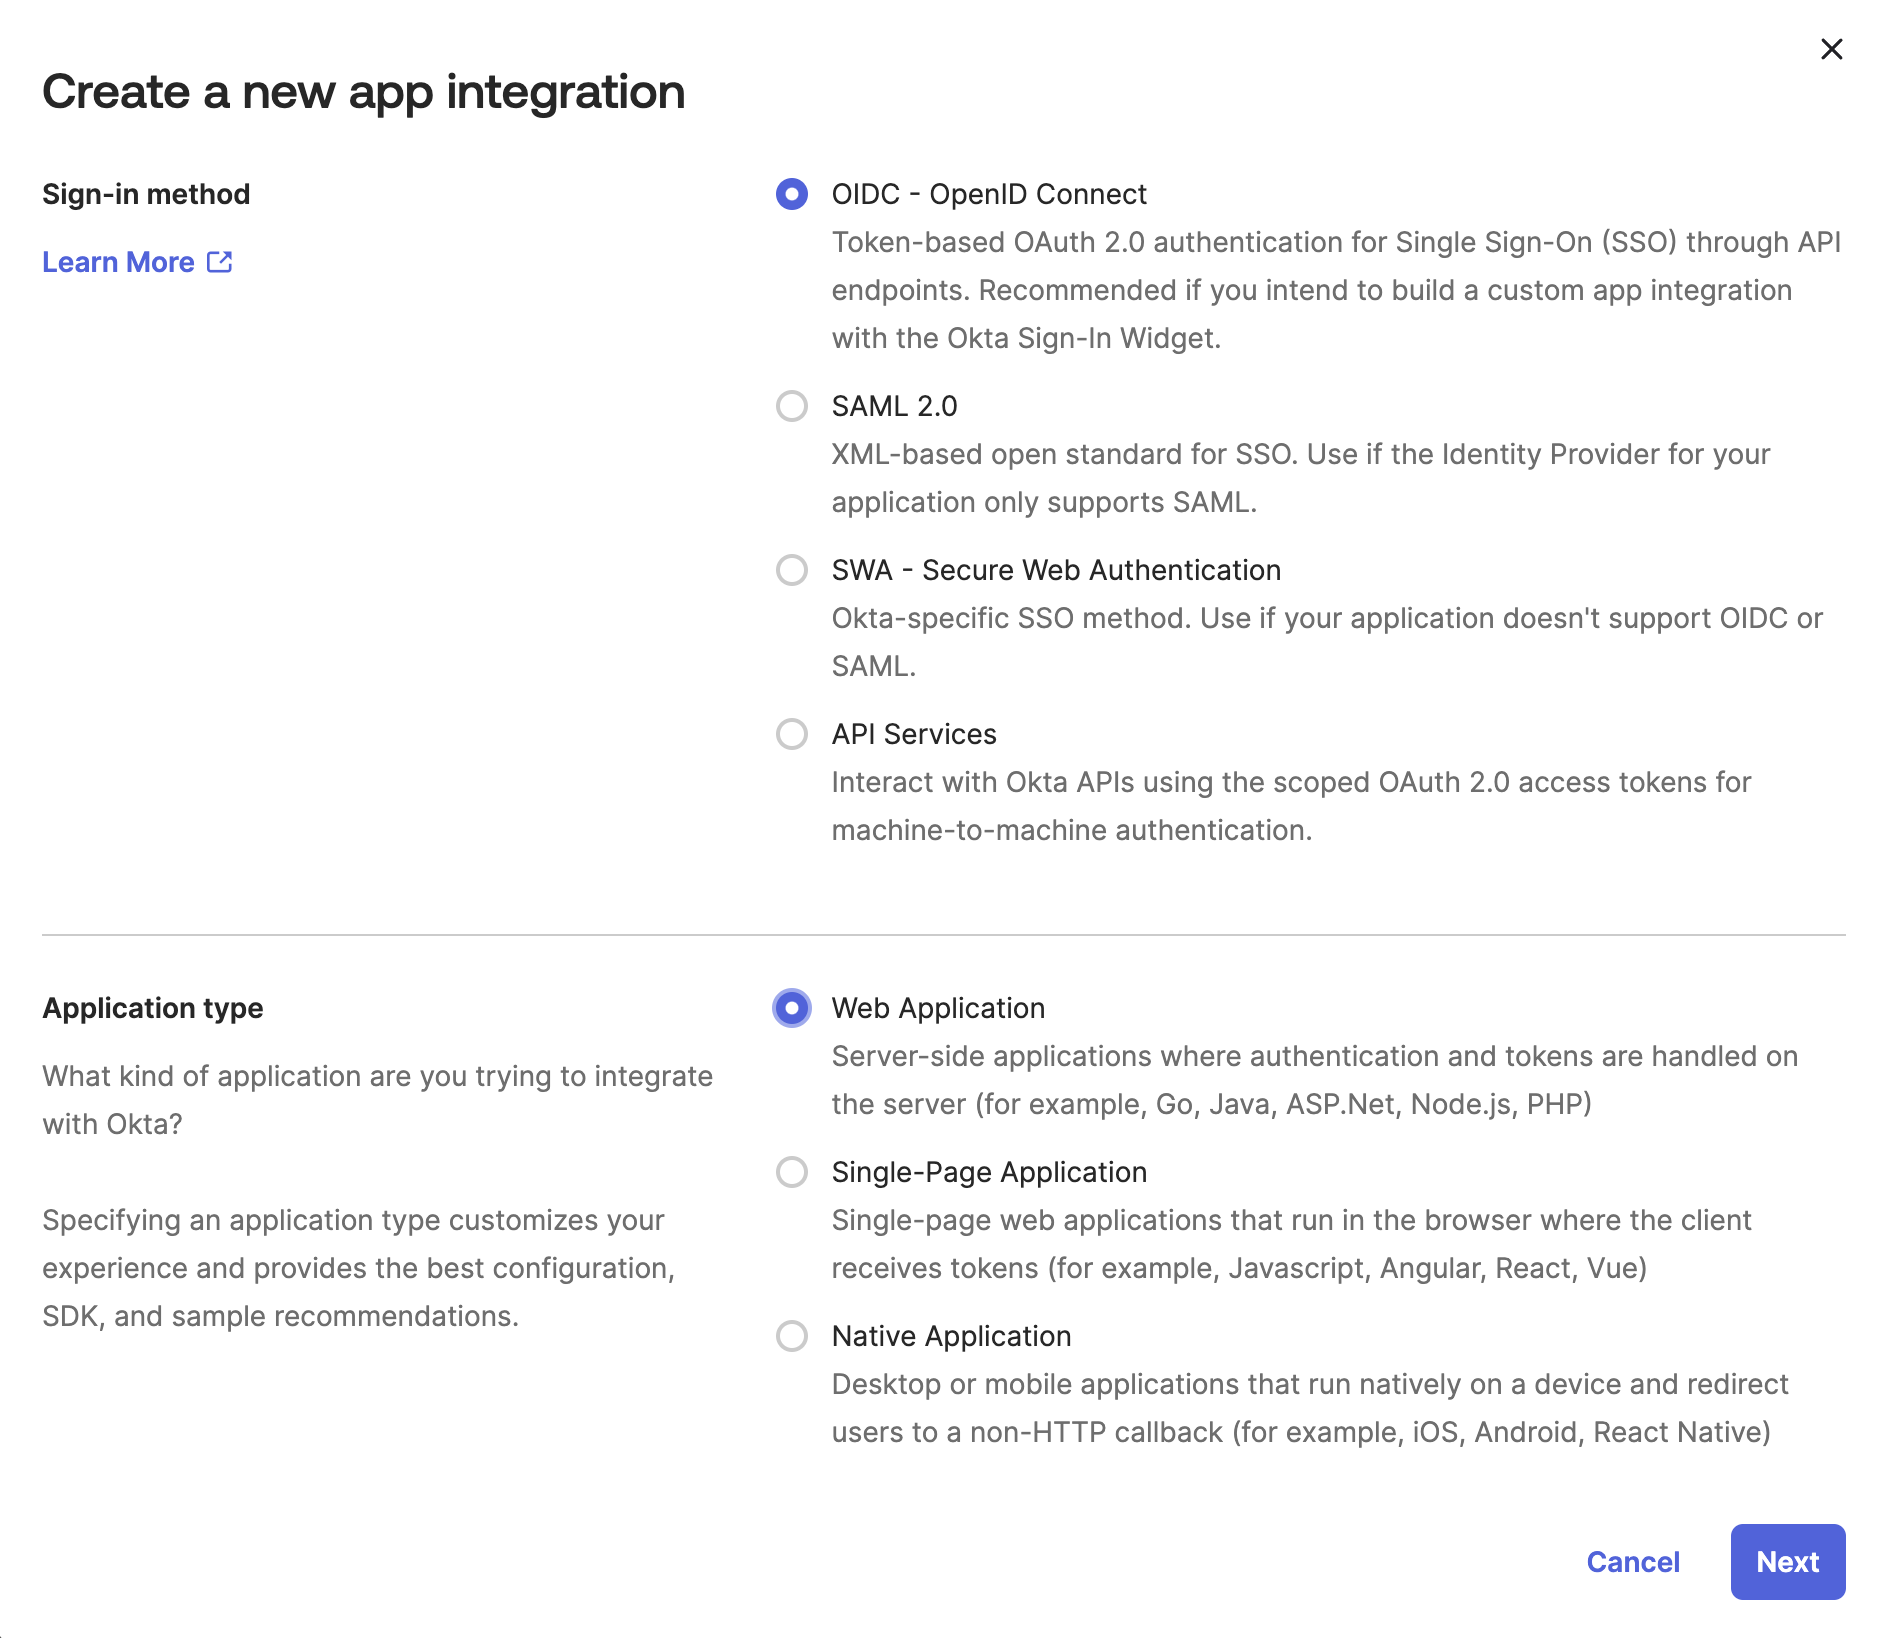
This will bring up the Create a new app integration dialog box. In the Sign-in method section select OIDC - OpenID Connect and in the Application type section select Web Application as shown below and then click Next.
You will be redirected to the New Web App Integration screen. Give your new application a name to identify it e.g. Logit.io. You can download the Logo from our CDN Here or use the url below.
curl -O https://cdn.logit.io/content/images/logo.png || wget https://cdn.logit.io/content/images/logo.png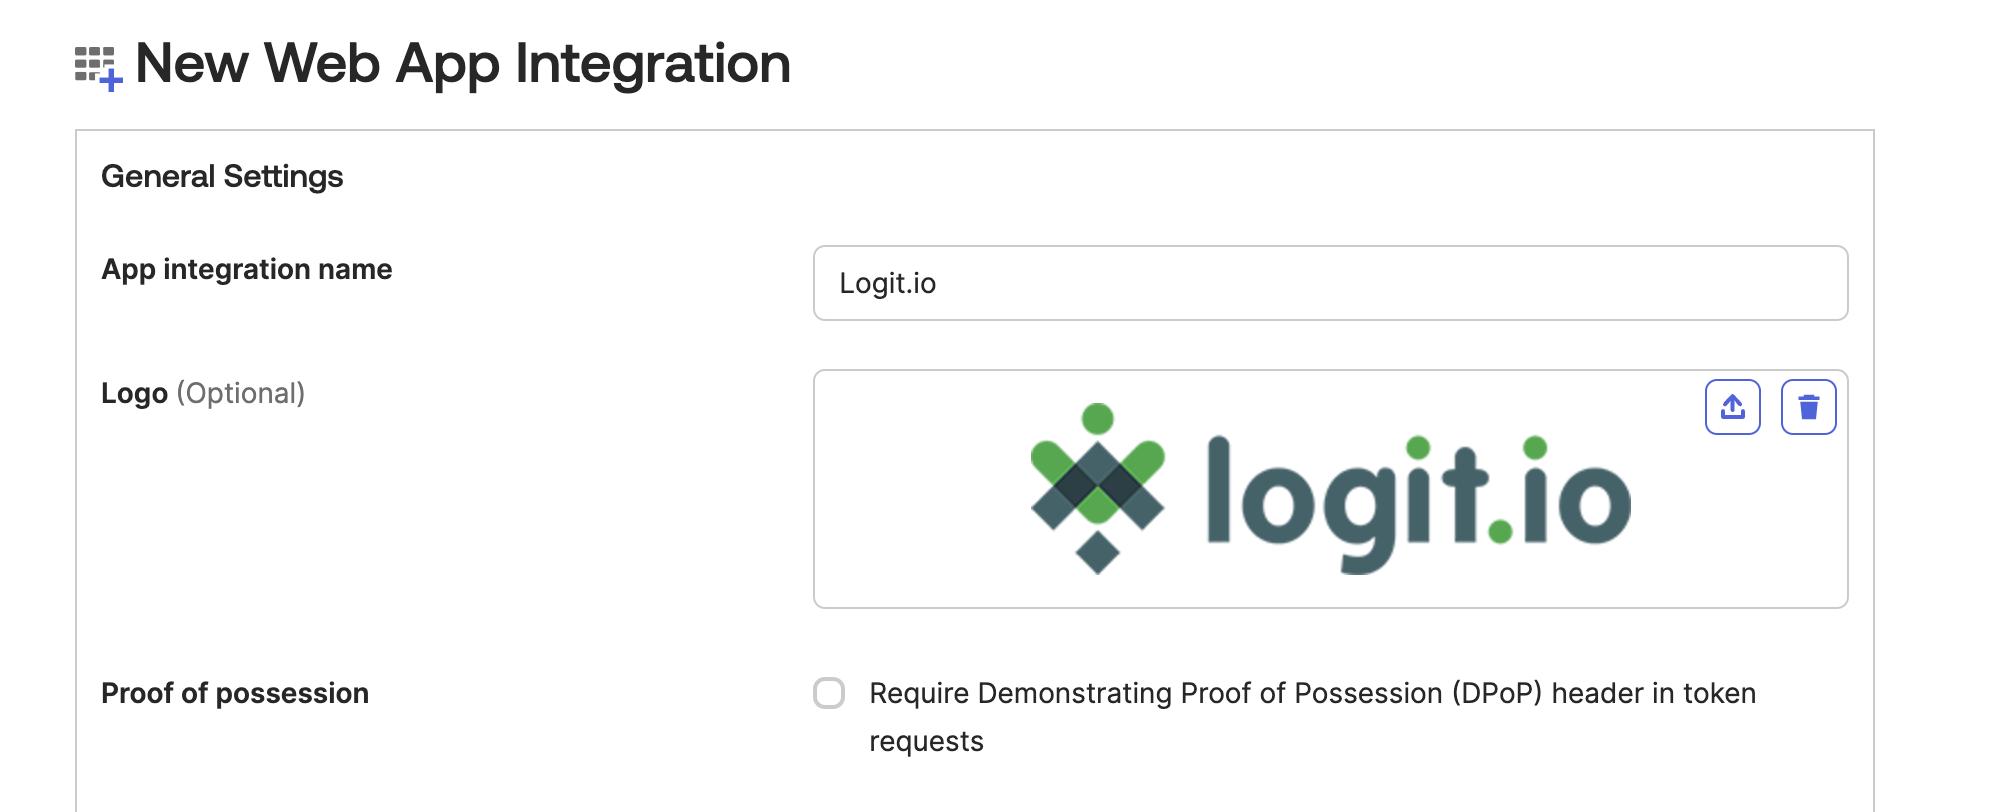
Now scroll down slightly to the Sign-in redirect URIs field and copy and paste this sign-in redirect URL below.
https://auth.logit.io/login/callback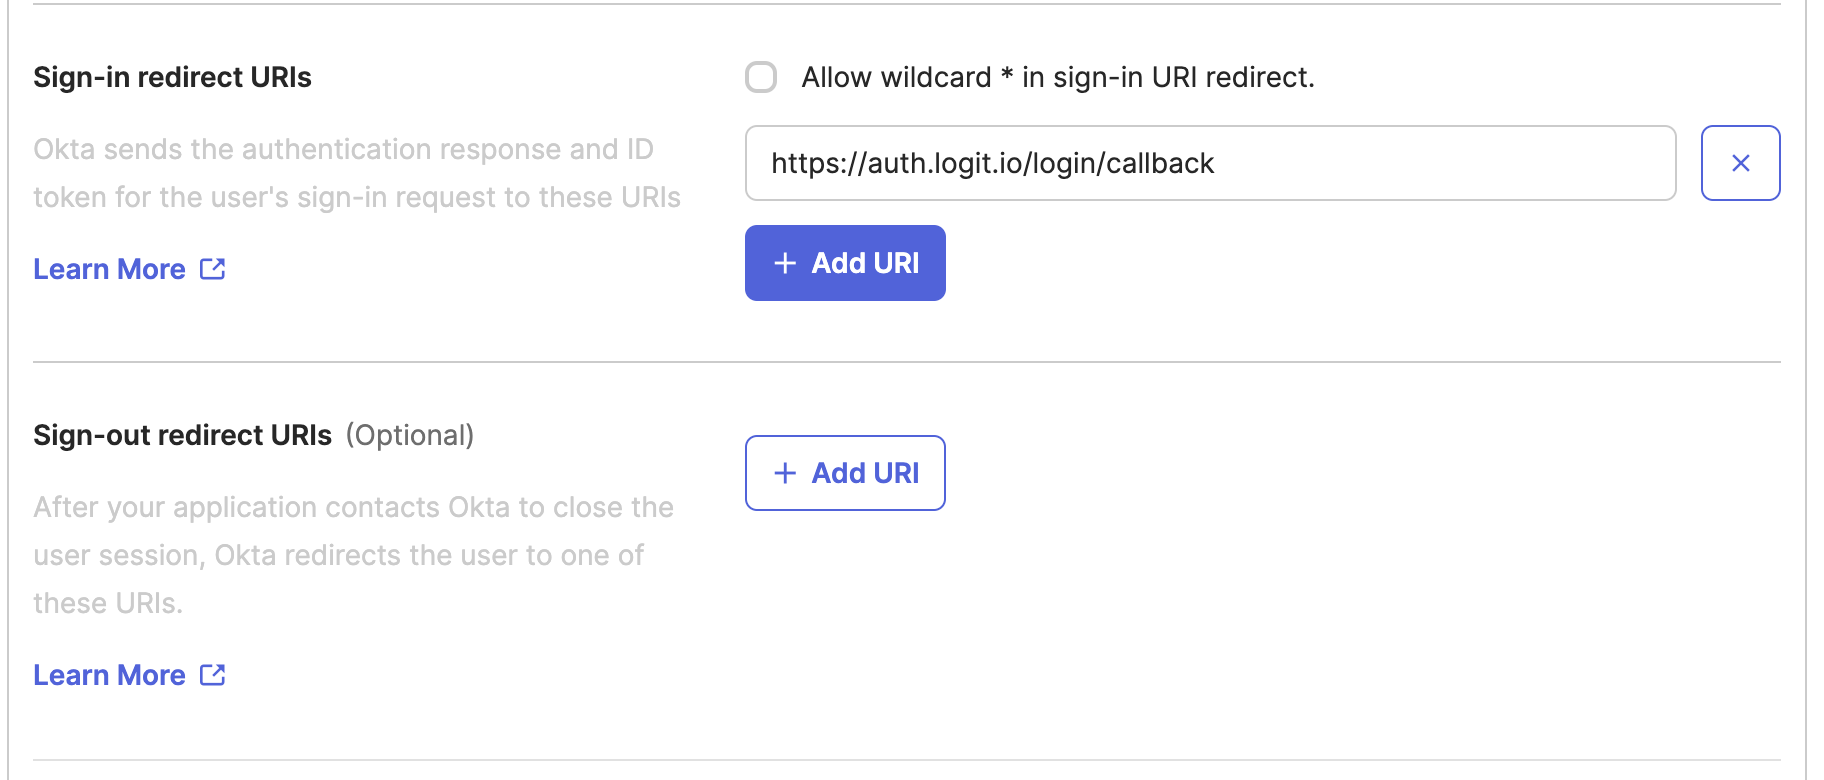
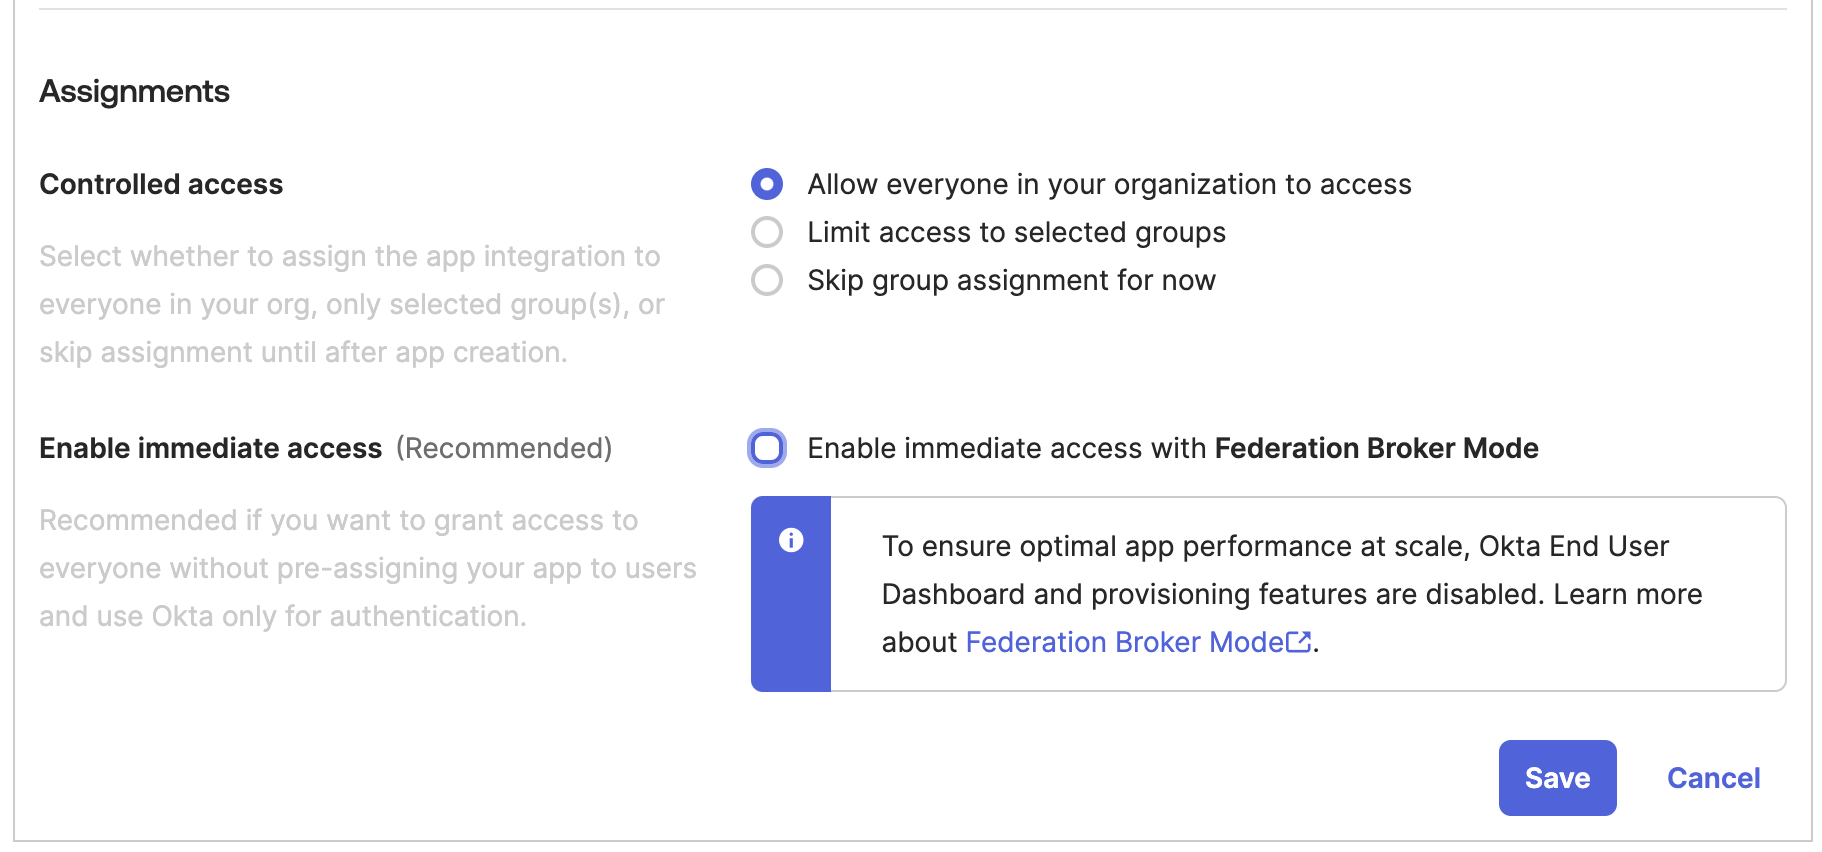
Finally scroll down to the Assignments section and click Allow everyone in you organization to access for Controlled access and also de-select Enable immediate access with Federation Broker Mode for Enable immediate access and then click Save.
Info - Clicking Allow everyone in your organization to access means that all users are automatically assigned to the new app without you having to do it for each user manually.
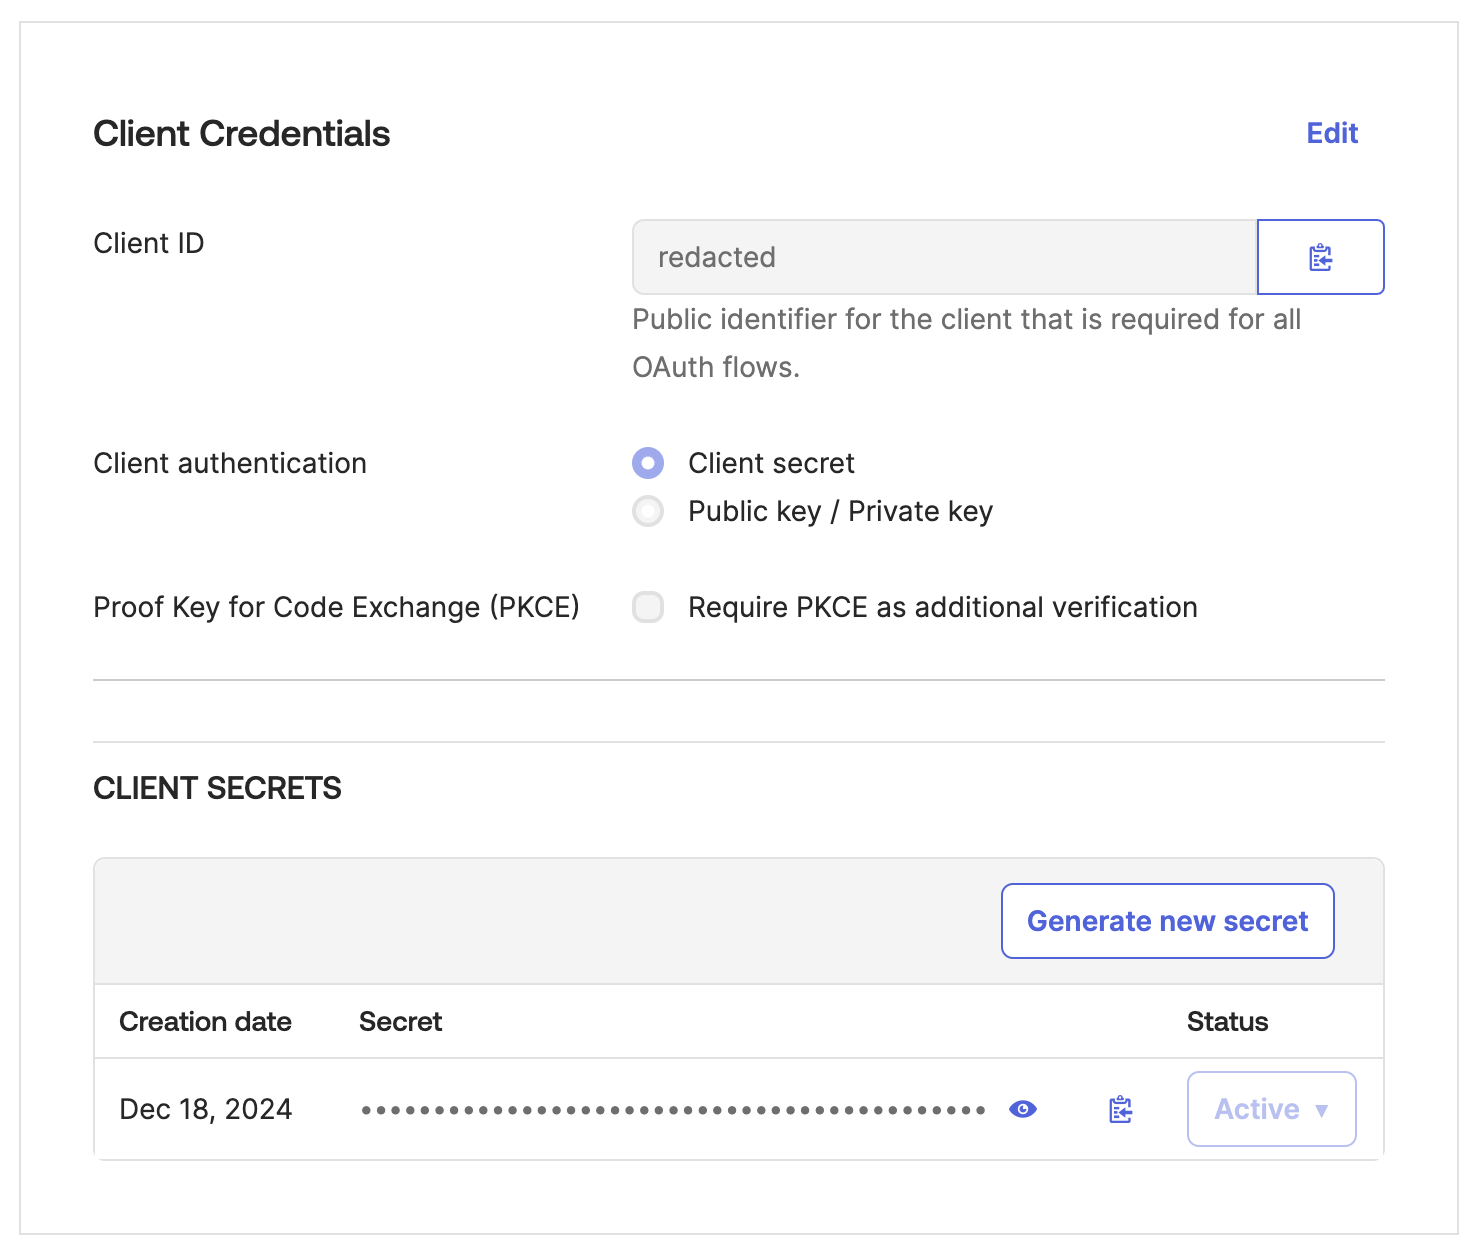
You will be returned to the General tab of the Application. From here copy the Client ID and the Client Secret to somewhere as they will be required later.
Scroll down to the General Settings section and click "Edit".

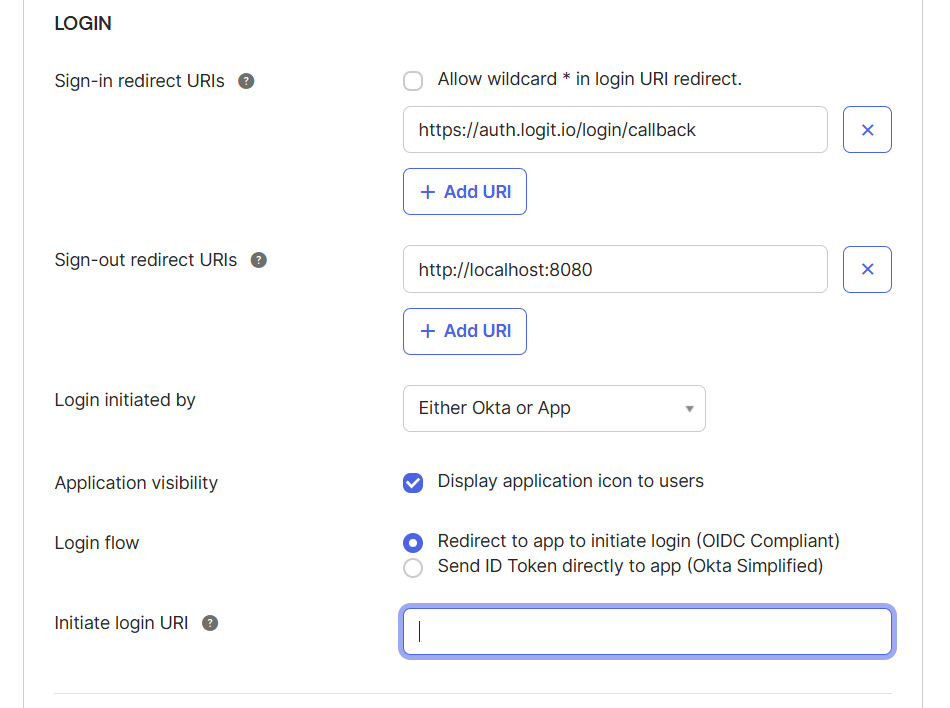
We need to fill in the LOGIN section of the General Settings.
We already filled in the Sign-in redirect URIs when we created the app and the Sign-out redirect URIs can be left as it is.
For the Login initiated by property set the dropdown value to be Either Okta or App.
For the Application visibility property, select Display application icon to users.
For the Login flow property select Redirect to app to initiate login (OIDC Compliant)
The final property is Initiate login URI, this property will be left blank for now and Logit.io will send you this URI when configuration has been completed.
After setting the properties described above your settings should look the same as the screenshot below:
Now save the LOGIN settings.
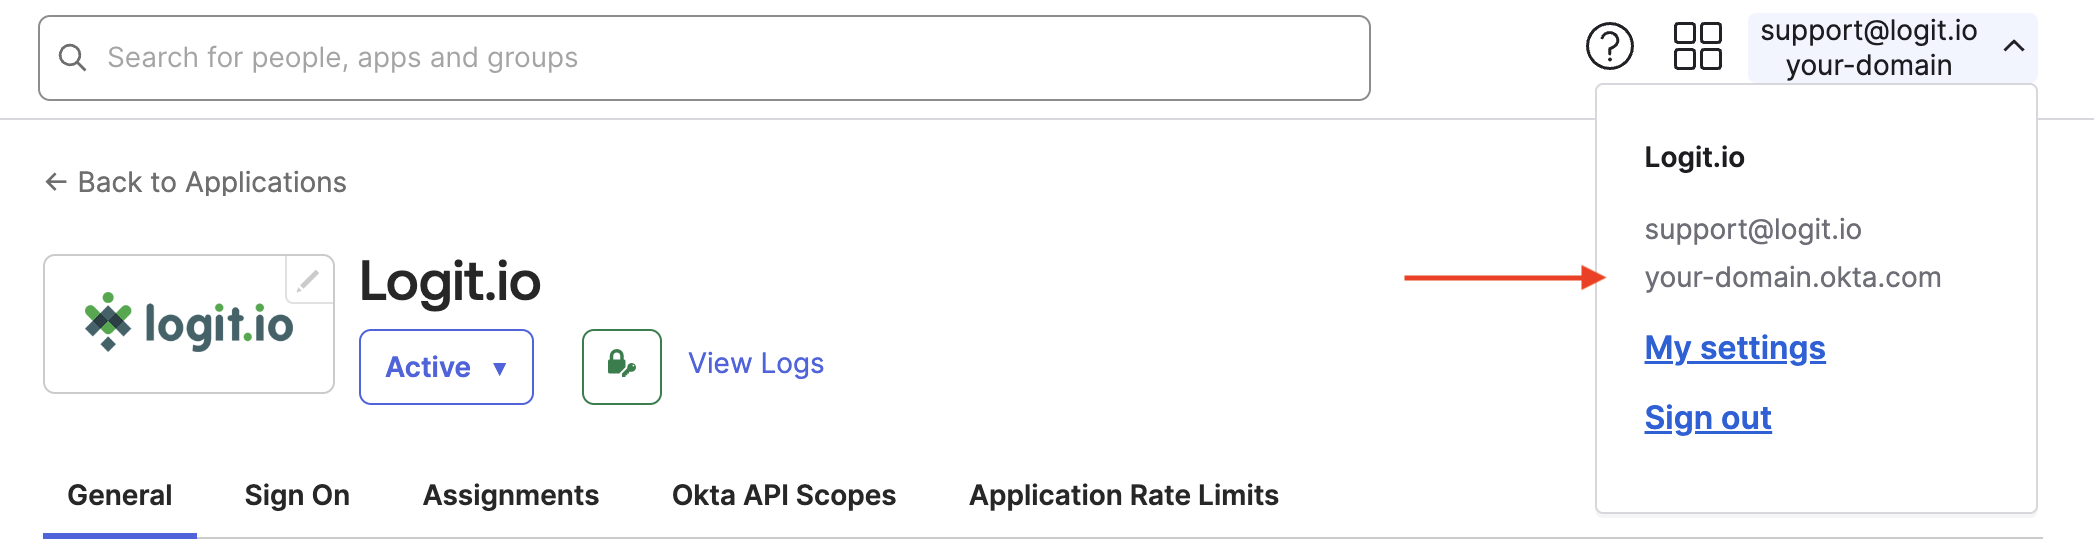
Finally, you need your Okta Domain, if you do not know what this is you can get it by clicking on your username in the top right-hand corner and copy it from here as shown below. Note you will need this later.
Send your configuration to Logit.io
Now that you have set the account up you have everything you need to contact us to set this up for you. Please email us at [email protected] and include the following information:
Request to enable Single Sign On for AccountId: @account_idLogit.io AccountId: @account_id
Okta Domain: @domain
Okta Client ID: @client_id
Okta Client Secret: @client_secretThe email text should be replaced with the values that you stored during the OKTA app creation process.
Setup confirmation
Once we have configured Okta for your Logit.io Account you will receive a confirmation email and this will include your Initiate login URI.
You will need to sign into your OKTA account and then go to the Admin area and select the app that you created above.
This will open you in the General tab. In here you will need to scroll down to the General Settings section and click "Edit".
In the LOGIN section find the Initiate login URL property and paste in the URI that was sent to you and then save.

Now when you click on the Logit.io app in the My Apps area of Okta you will be launched straight into the Logit.io website without needing to Authenticate again.
